Multiple ticketing platforms in one event
If you sell the same show on more than one system (for example different regions or partners), you still run one event in Ticket Validation. Each external system gets its own ticket source, ticket types are created under that source, and you run one import per platform so every row keeps the correct origin.
This builds on account setup (sources and types), set up an event, and prepare tickets for import. Read those first if you are new to the product.
Create one ticket source per platform
Under Ticket sources in the manager app, add a separate source for each place you sell tickets. The name should make it obvious in reports and at import time (for example the platform’s brand name).
Examples (names are yours to choose):
- Source Resident Advisor for sales through that channel.
- Source Eventix for another channel.
- Source Direct / Box office for in-house sales, if you track them separately.
Imports always ask which source a file belongs to. Getting this layer right first avoids mixing batches from two systems under one label.
Video walkthrough
Attach ticket types to the right source
Each ticket type belongs to exactly one source. Create the tiers you sell on platform A under source A, and the tiers for platform B under source B. Display names can match across platforms (for example “General admission”) as long as each type record is tied to the correct source in your account.
When validators scan, the system knows which pool a ticket came from. That also lines up with CSV exports: the “type” column in each file maps to types that share that source when you import.
Consistency: Use the same spelling you expect in platform exports for tier names, so column mapping during import is straightforward.
Video walkthrough
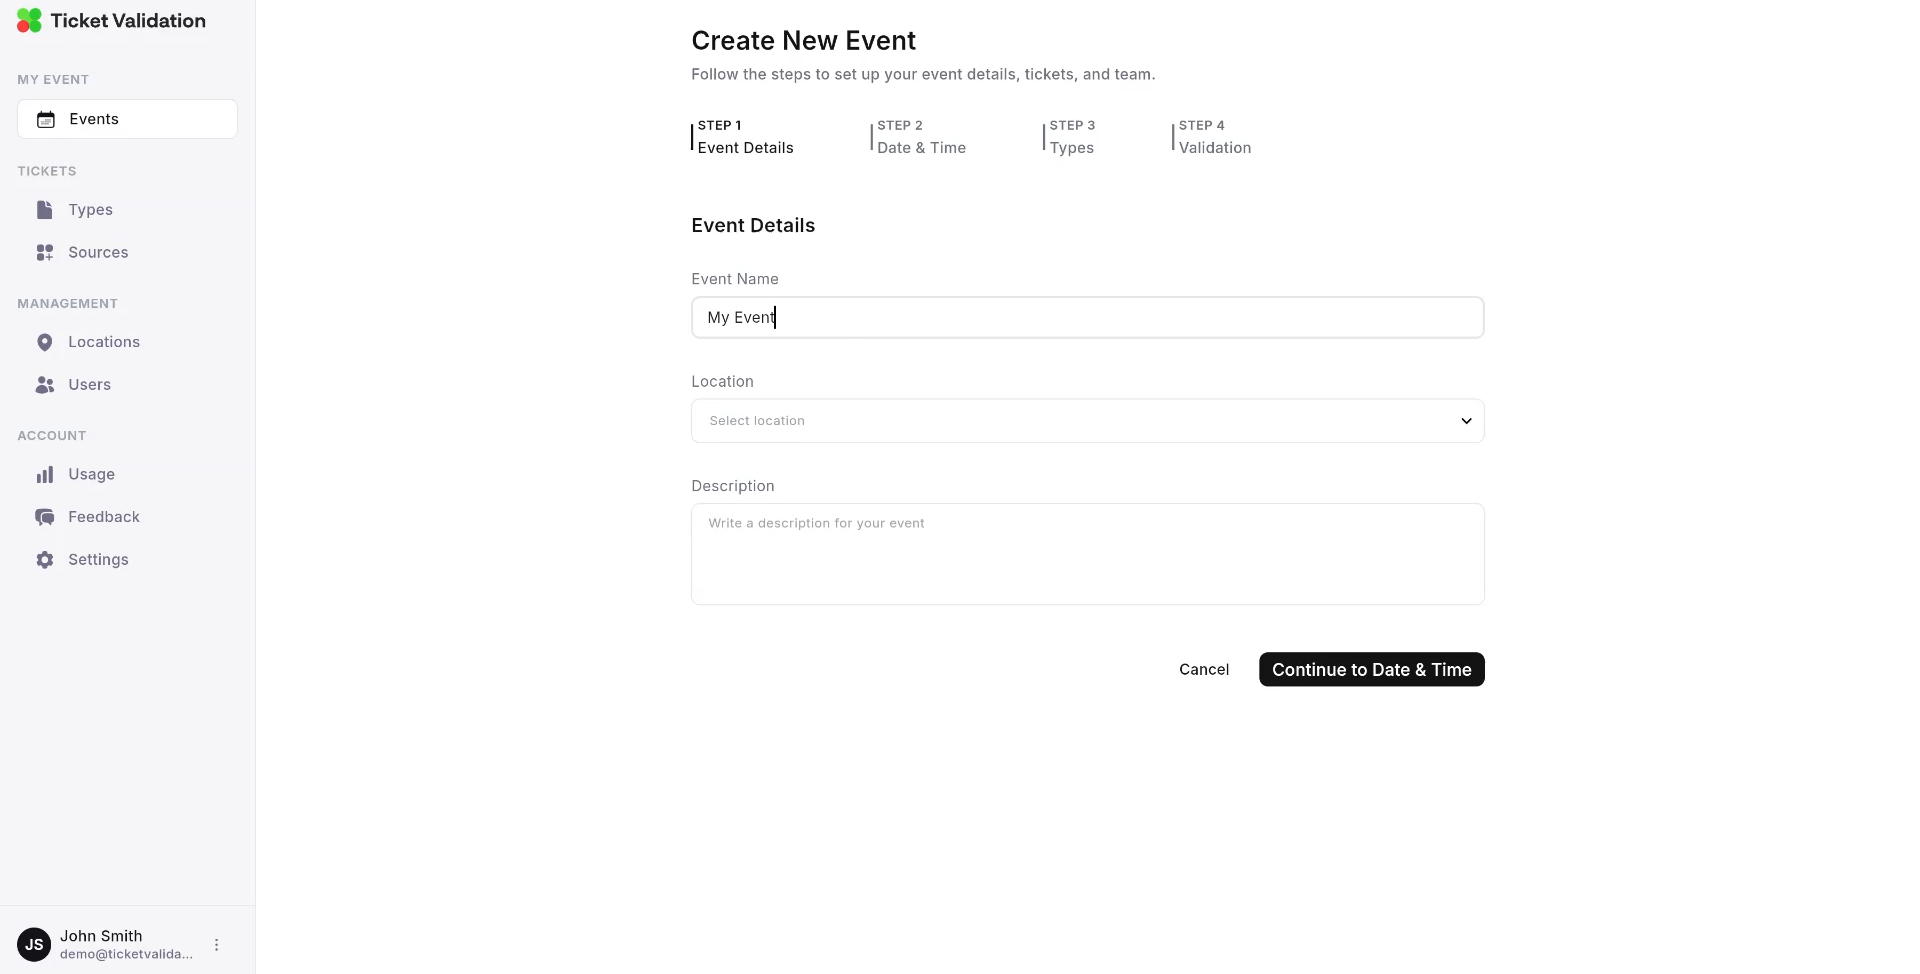
Configure one event with every type you need
Create a single event and, on the Types step, include all ticket types that should be valid at the door, across every platform. You are not duplicating the event per platform; you are listing every tier the show offers so imports can attach tickets to the right type regardless of where they were sold.
Complete dates, location, validators, and validation rules as usual. See How to set up an event for the full flow.
Preview
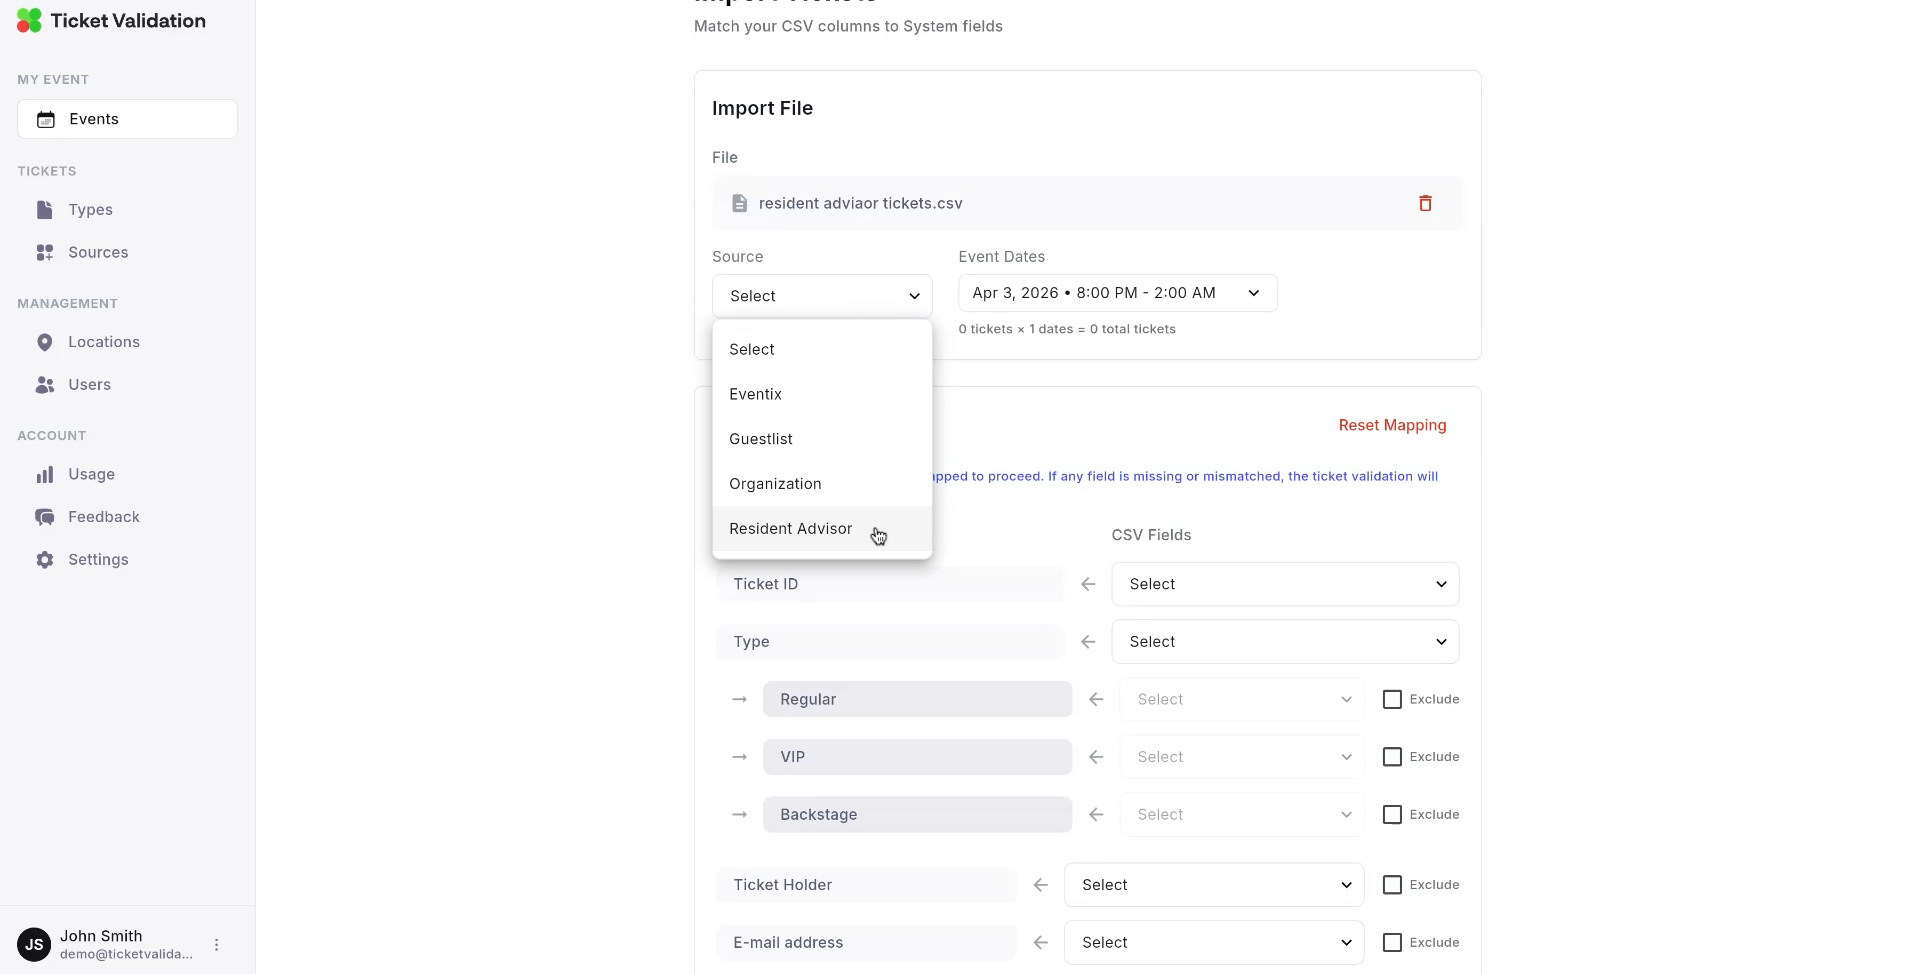
Import each platform’s file with its source
From the event, open Tickets and run Import tickets once per export file. Each run uses the CSV from one platform and the source that matches that platform. Column and type mapping works the same as a single-channel import; you repeat the wizard for the next file when the first import succeeds.
Typical order:
- Upload platform A’s CSV, choose source A, map columns and type values, confirm.
- Upload platform B’s CSV, choose source B, map again, confirm.
- Continue until every batch is in.
Details on CSV shape and mapping are in How to prepare tickets for import.
Preview
- Traceability: You can see which channel a ticket came from in reporting and support.
- Cleaner imports: Each file maps to one origin, so you are not forcing two exporters into one ambiguous source.
- Future rules: Validation or analytics can be scoped per source when your workflow needs it.
- Wrong tickets after import: confirm the source selected for that run matches the platform you exported from.
- Type mapping errors: ensure ticket types exist under the same source as the CSV’s platform, and names align with the export.
- Missing tier at the event: edit the event and add the ticket type on the Types step, then import again or adjust the file.
One door, every channel
When all imports finish, every ticket lives on the same event for scanning. Use How to use the mobile app to brief your team at entry.