Point of Sale (POS)
Point of Sale lets you sell tickets on-site for an event: organizers configure capacities, prices, and which users may sell in the manager web app; sellers use the Ticket Validation mobile app to issue real tickets that enter the same validation flow as imports. For sales volume, sellers, and POS logs, use POS statistics on the event’s POS tab in the manager app.
If you are new to the product, complete account setup and set up an event first.
POS flow overview

- Plan: POS is available when your subscription supports it. If the control is disabled in the event editor, upgrade or contact support.
- POS ticket source: Account settings define which ticket source POS-issued tickets use. The first time you open POS setup, you may be prompted to pick or create that source and save settings.
- Seller users: At least one user must have the Seller role. Without a seller, the app blocks POS setup and offers to create one.
- Event: The event should include the ticket types you intend to sell at the door and valid event dates.
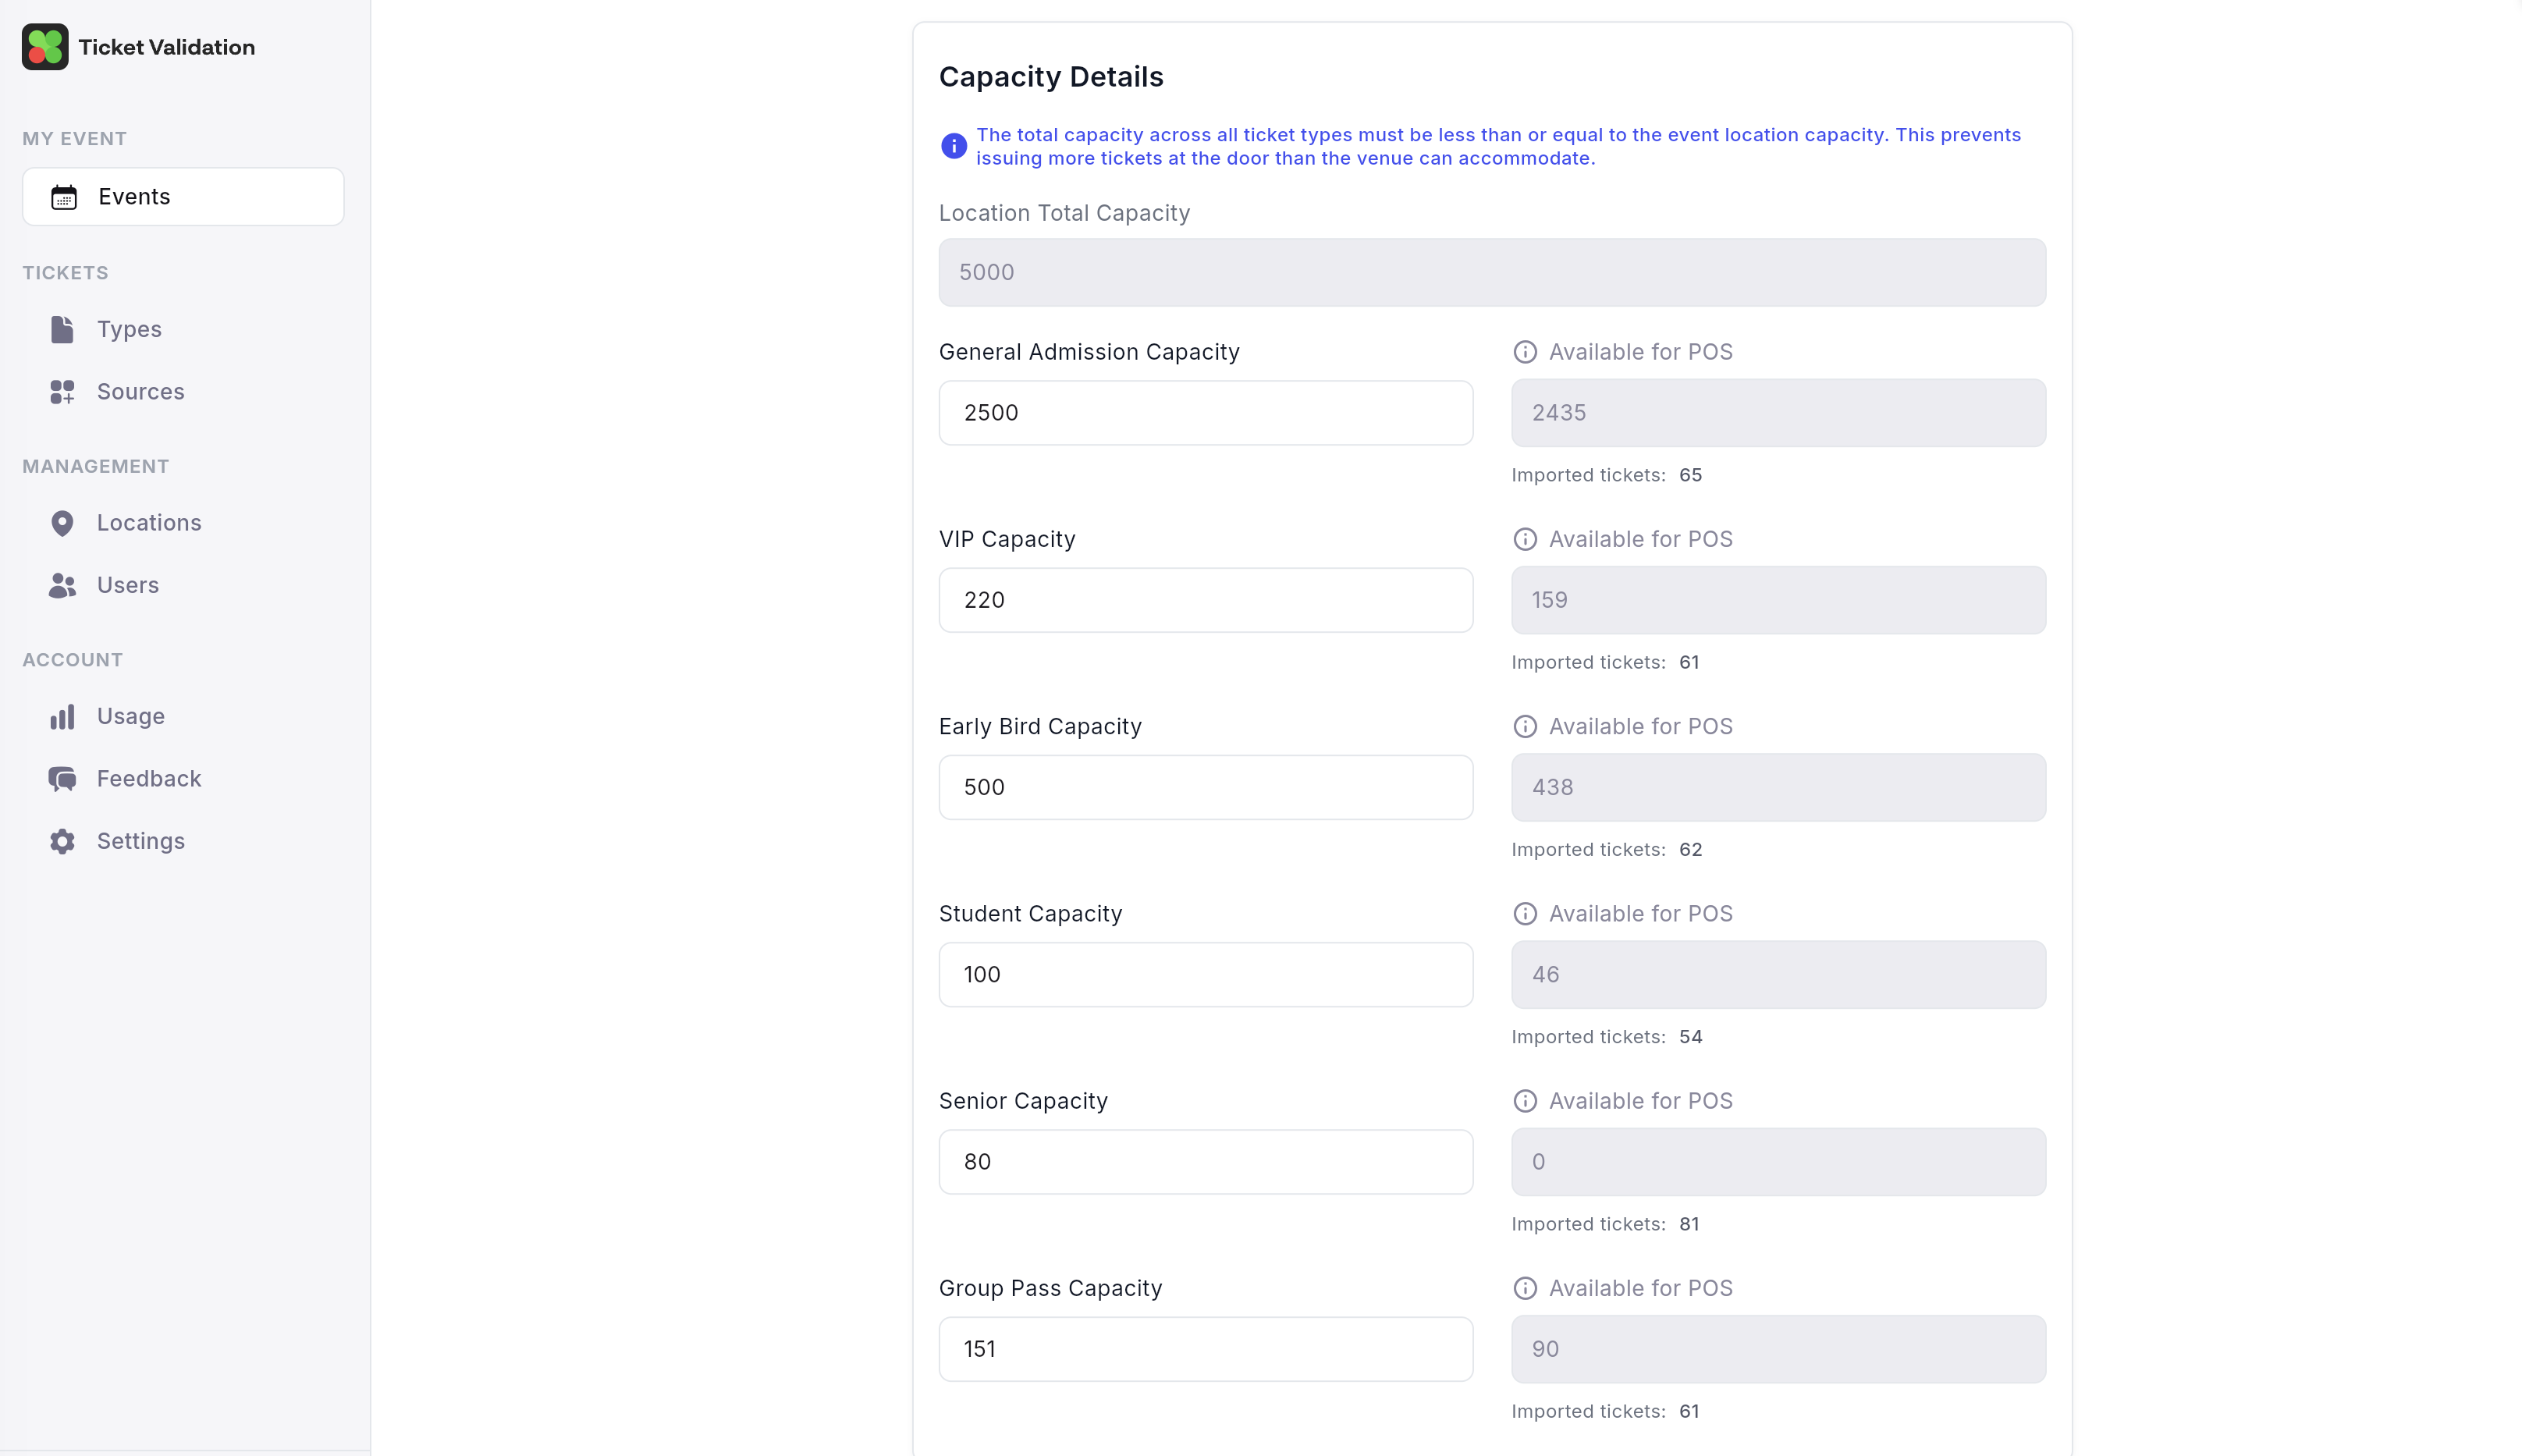
Tip: Capacity planning compares POS limits to imports per date. Keep imported ticket counts in mind when you set sellable caps.
Turn on Ticket POS
Open the event in the manager app and enable Ticket POS in the event settings. This unlocks the POS tab for that event so you can create or edit the configuration.
Until POS is enabled and configured, sellers will not have a sellable event on their devices.
Preview
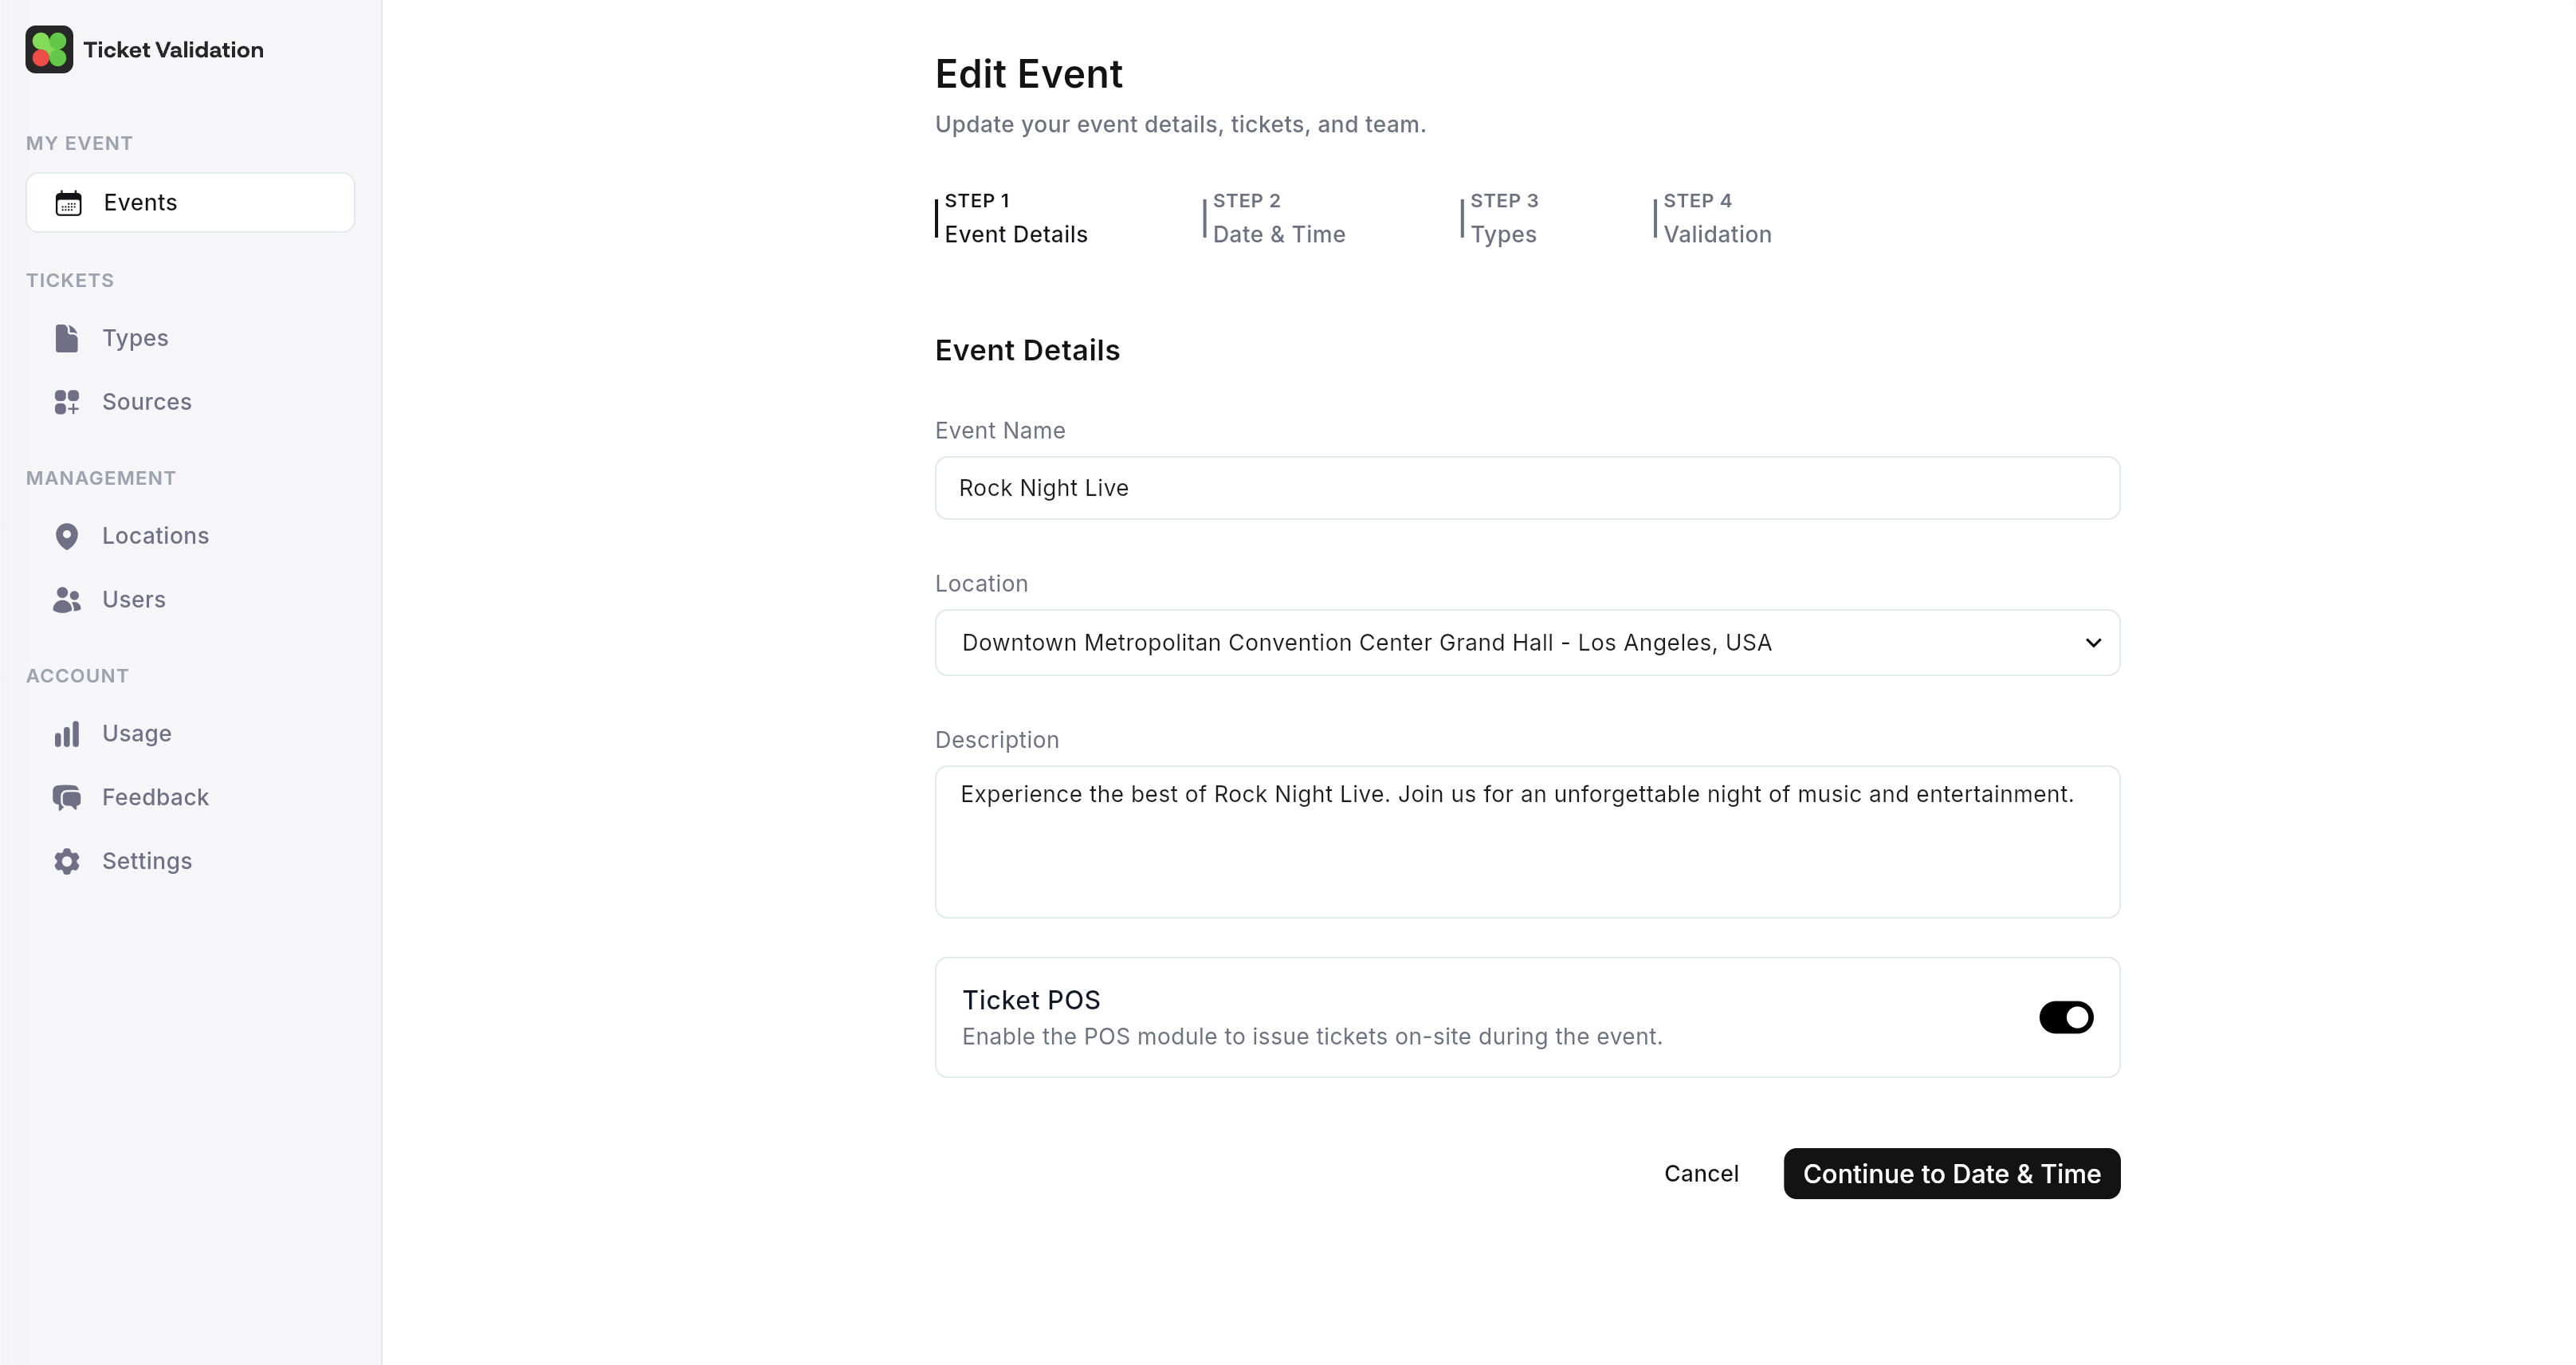
Run the setup wizard
From the event, open the POS tab and start Create POS setup (or edit an existing setup). The wizard has three steps:
- Capacity: how many tickets per ticket type and event date you allow for POS, with visibility into imports and venue capacity where applicable.
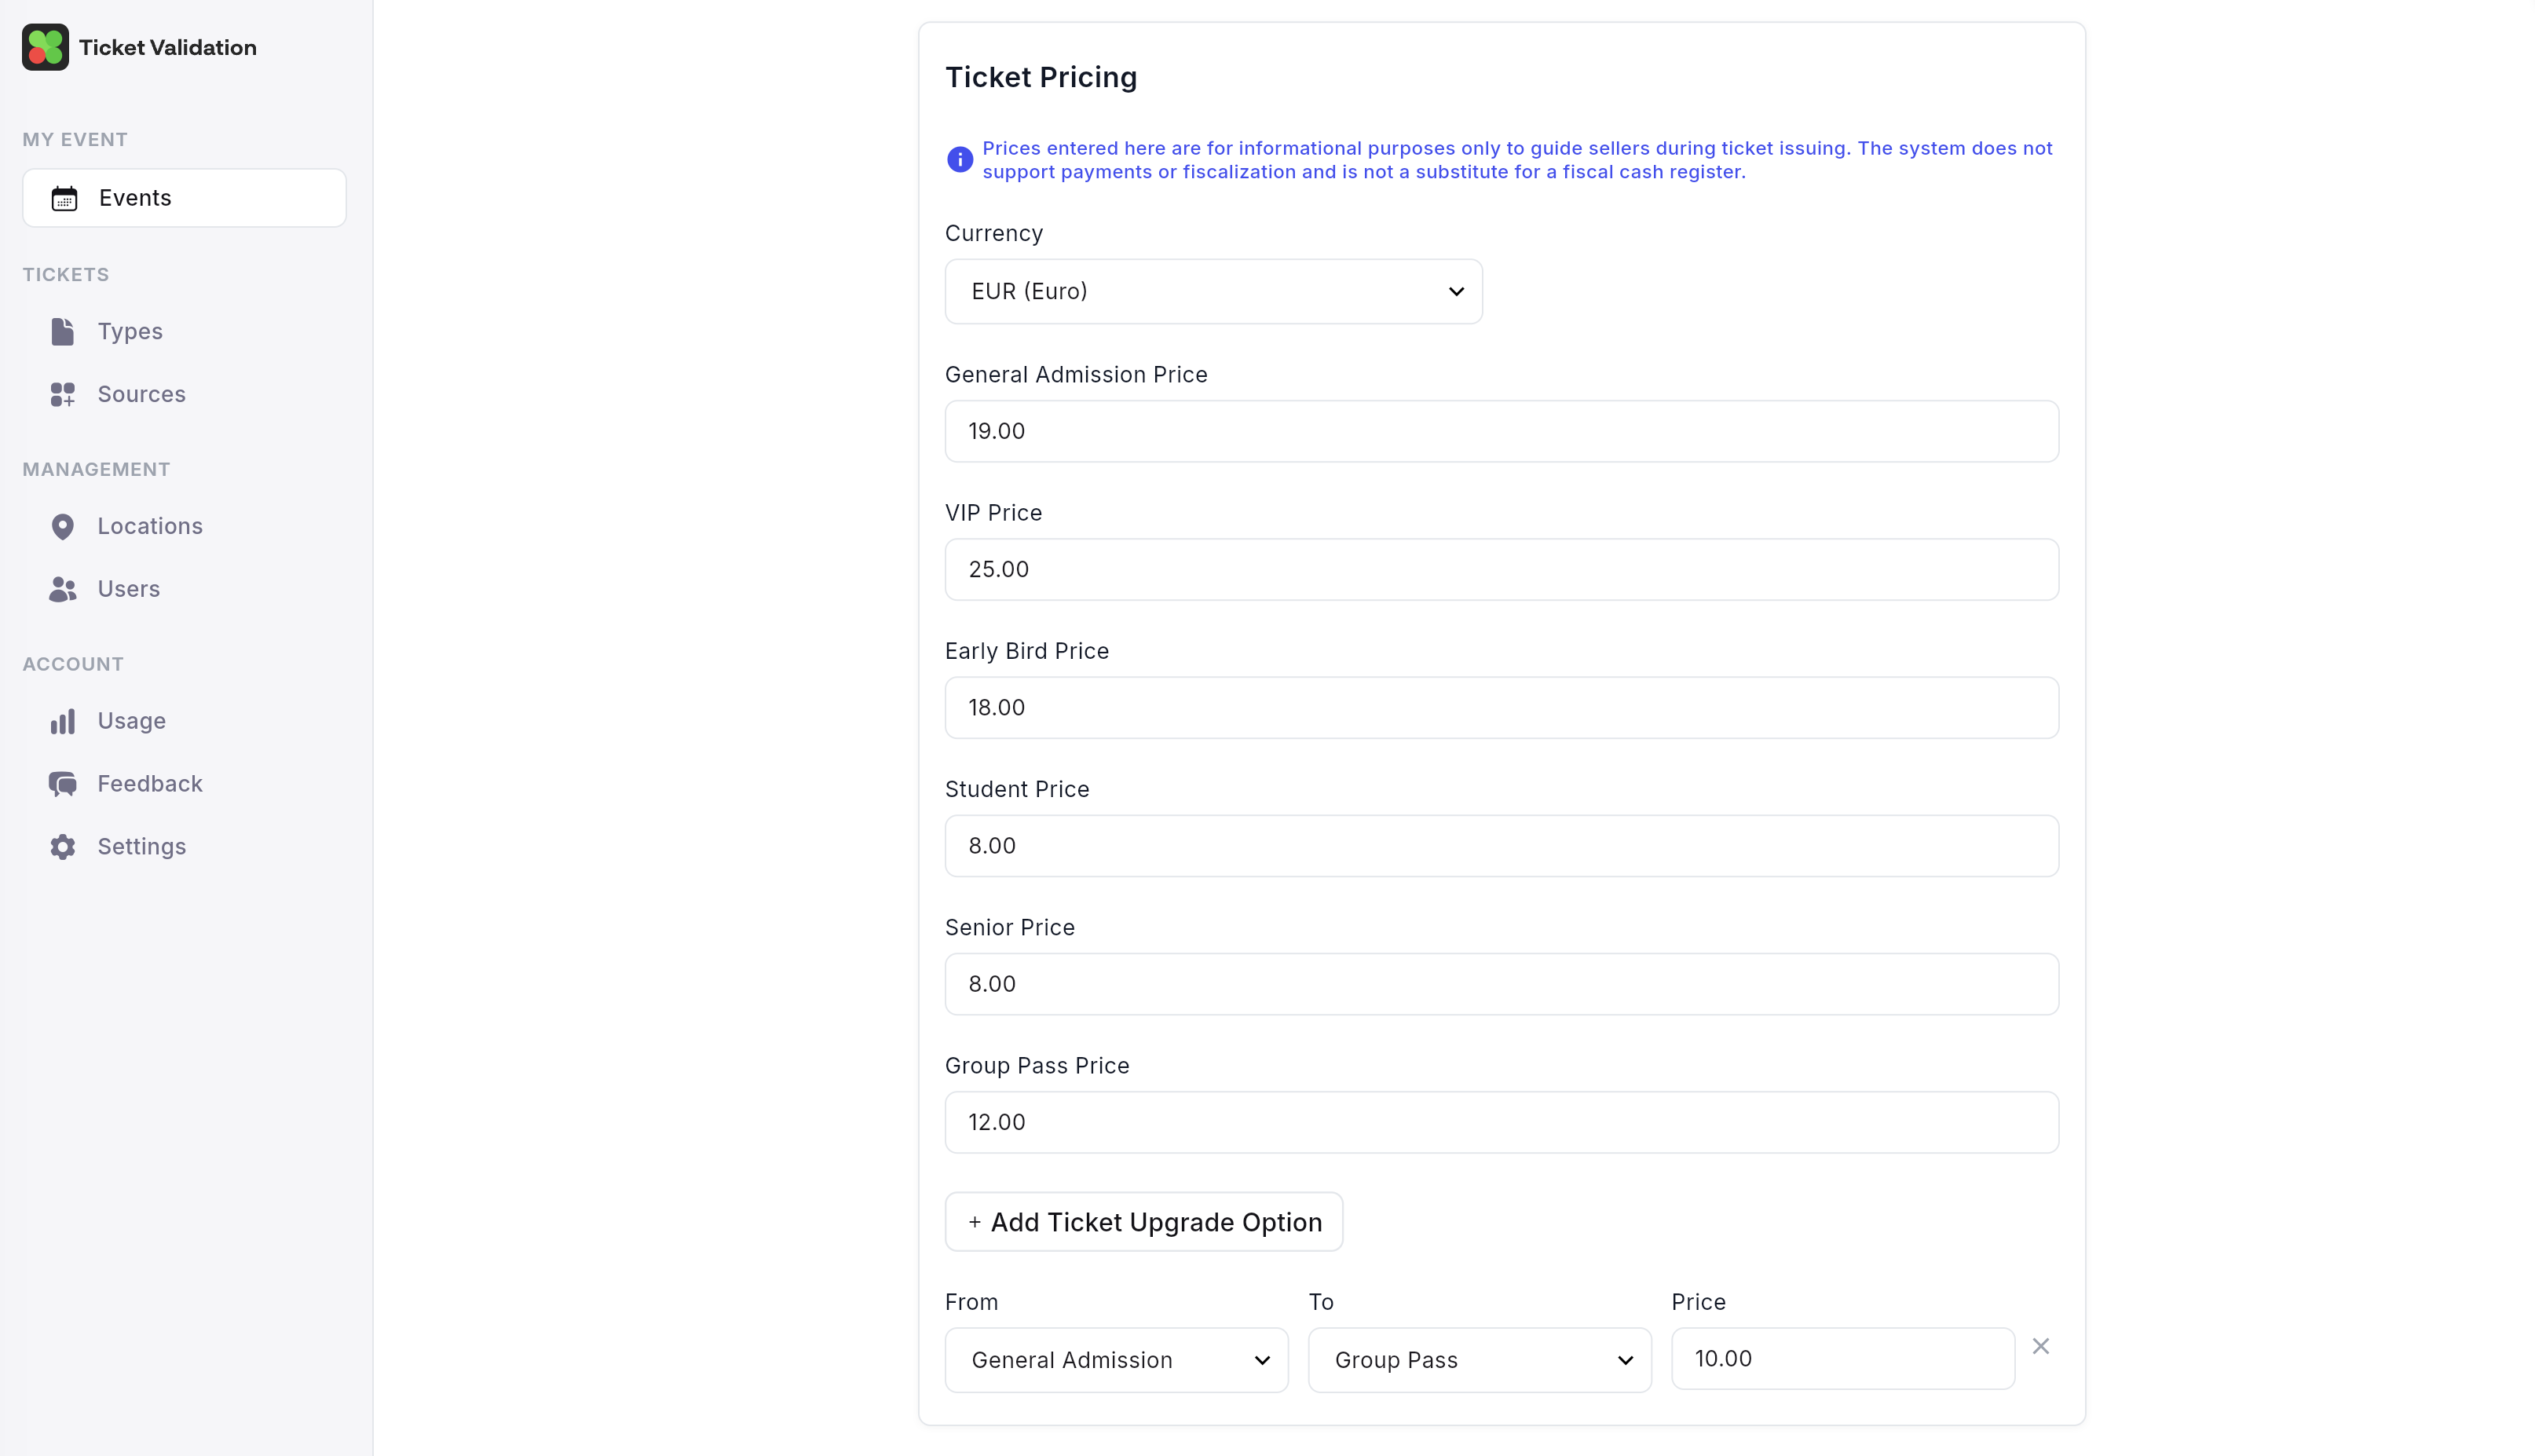
- Pricing: sale price per ticket type and date.
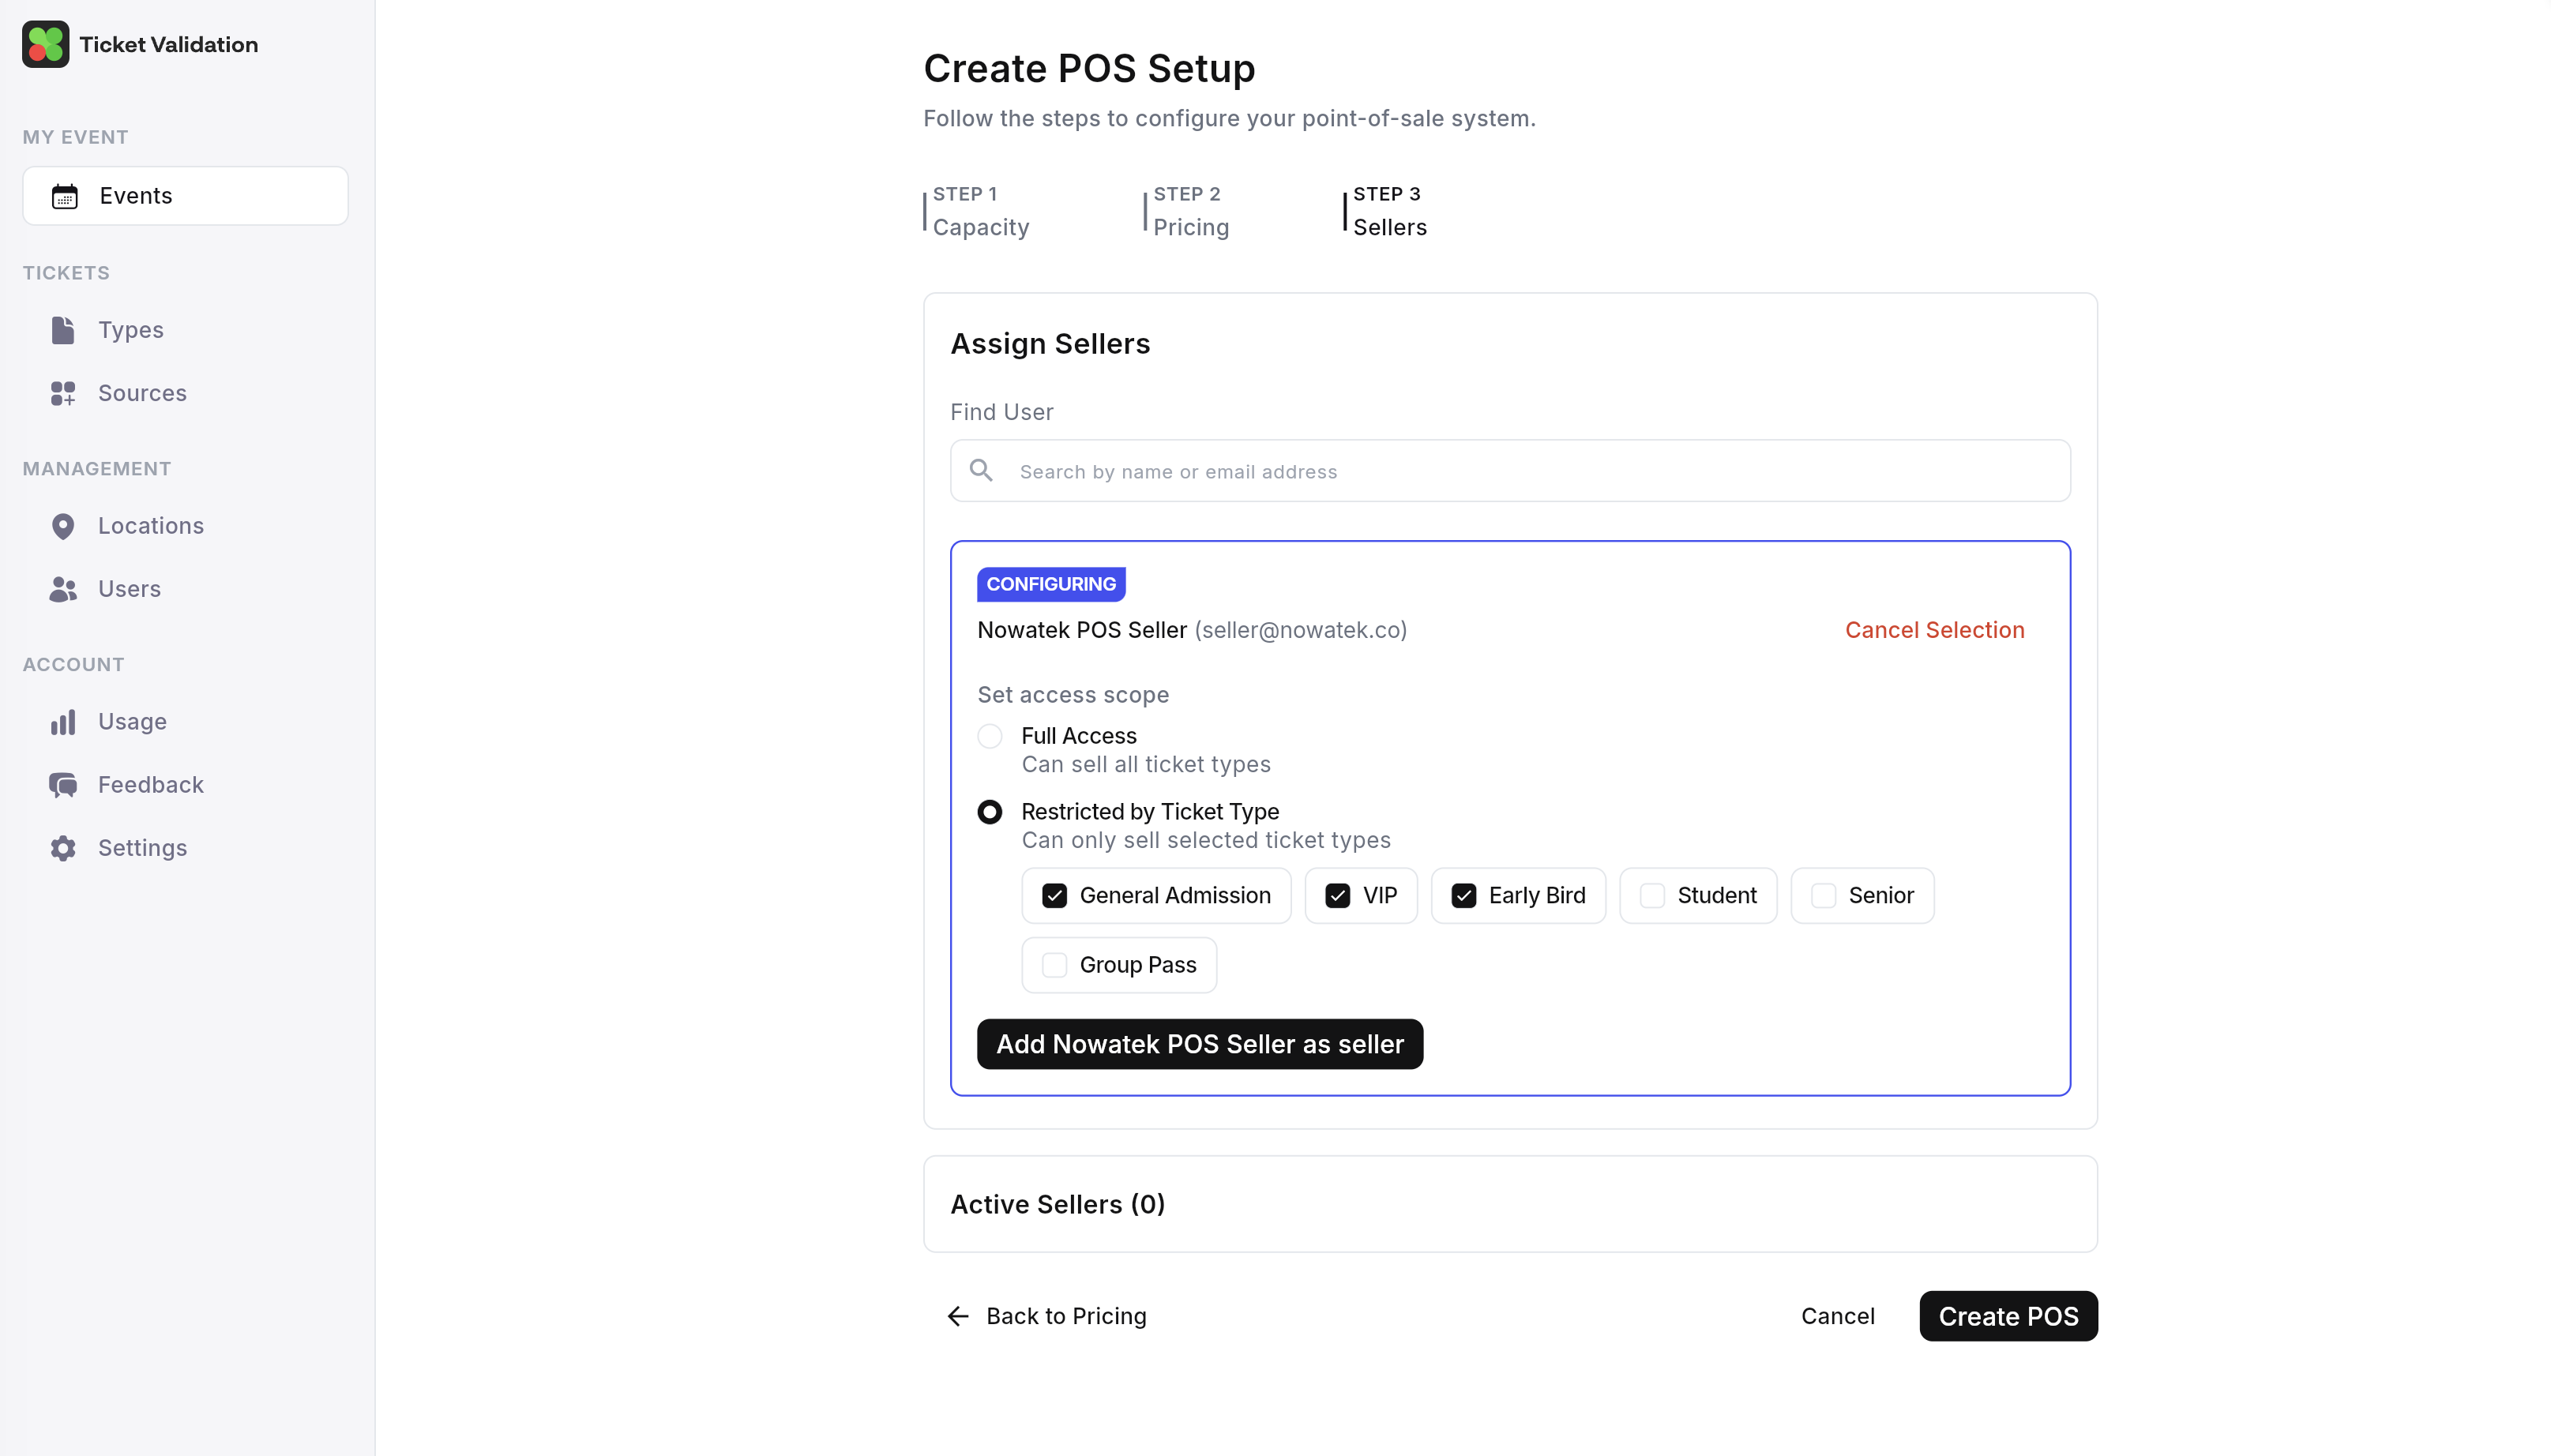
- Sellers: which seller users may offer which ticket types (and upgrade paths, if you use upgrades).
Submit saves the setup. Open Edit POS setup anytime to change capacity, pricing, or sellers.
The tab also surfaces validation messages if something is inconsistent (for example missing prices). Fix those before show day.
Preview
Issue tickets at the venue
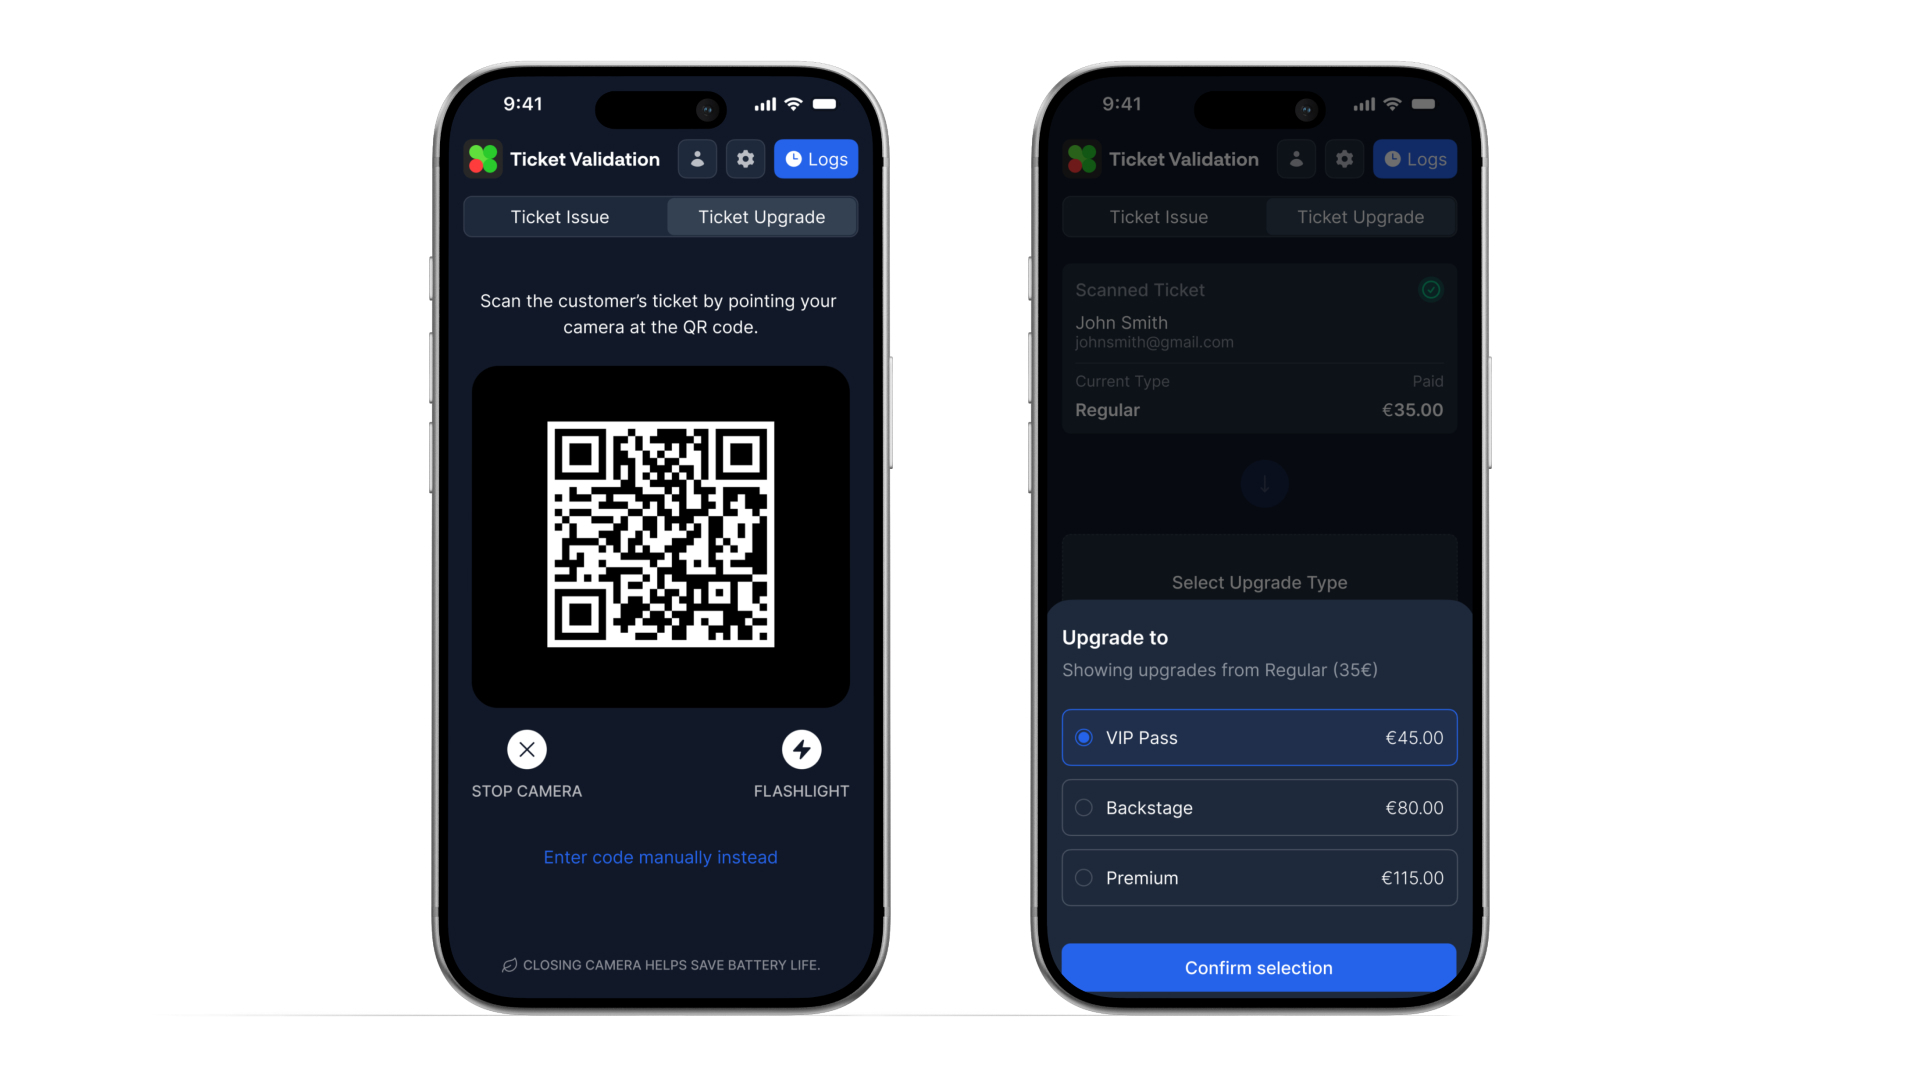
Sellers sign in to the Ticket Validation app with their seller account (the same app validators use, with a different role). When an upcoming event has POS configured, they can issue tickets from the seller flow.
Per sale they choose the event date, ticket type, and quantity, and optionally enter holder name and email.
Delivery rule: To complete an issue, either connect a supported thermal printer for physical tickets or provide a valid customer email for digital delivery. The app explains what is missing if both are absent.
After a successful issue, connected printers can print tickets; the platform records the sale for auditing and for POS statistics.
Validators vs sellers: Validators scan tickets at entry; sellers issue new POS tickets. Printer settings for sellers live in the seller experience on the device.
Preview

Update tickets (upgrades)
If your setup includes upgrades, sellers can scan an eligible ticket and issue an upgraded ticket based on the upgrade matrix you configured in POS setup.
Upgrade actions still respect capacity, ticket type permissions, and seller access. If a rule is not satisfied, the app explains why and blocks the issue.
Preview
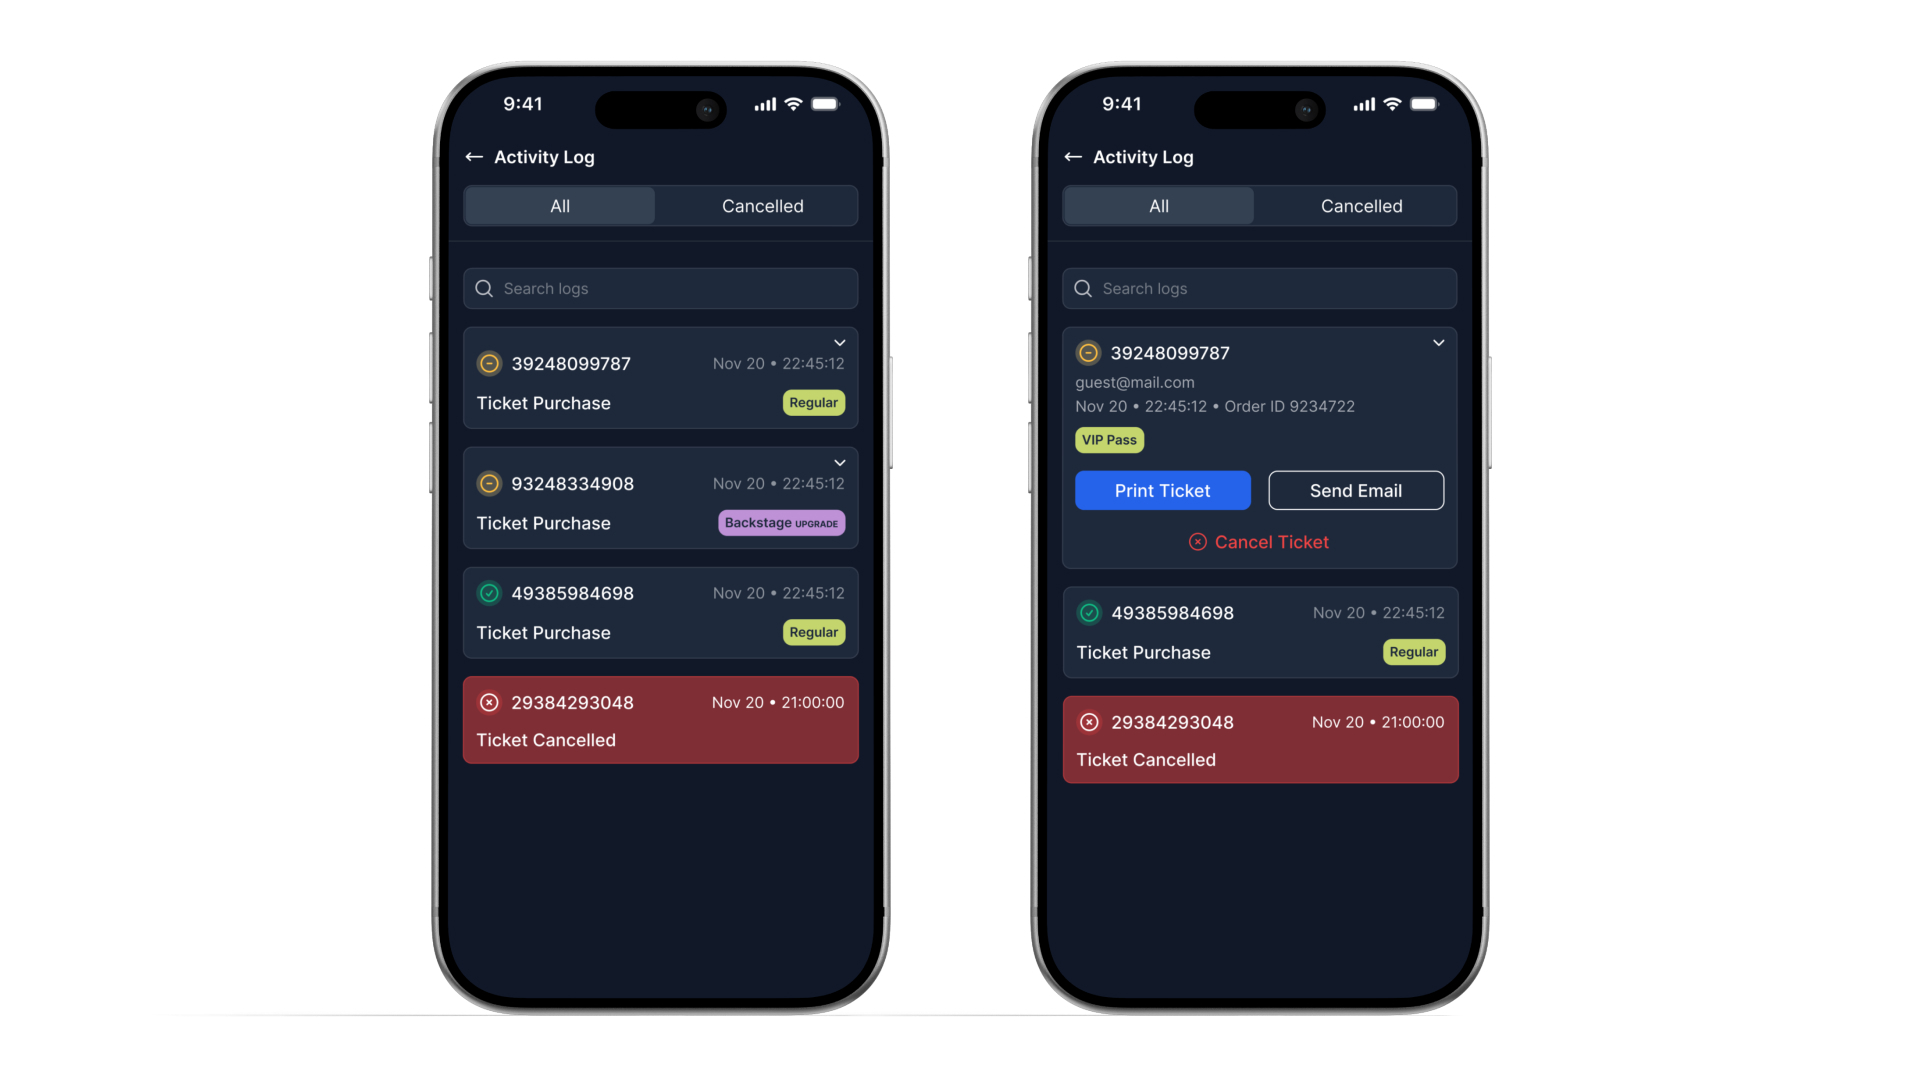
Use Activity Log for post-sale actions
Every issue or upgrade is written to the seller Activity Log with date, ticket type, status, and order details so your team can quickly audit door-side sales.
- Search logs: find a transaction quickly by ticket number or customer details.
- Filter by status: switch between all records and canceled items.
- Print ticket again: reprint a ticket when the customer needs another physical copy.
- Resend email: send the digital ticket again to the buyer address.
- Cancel ticket: cancel a ticket directly from the log when policy allows it.
Preview
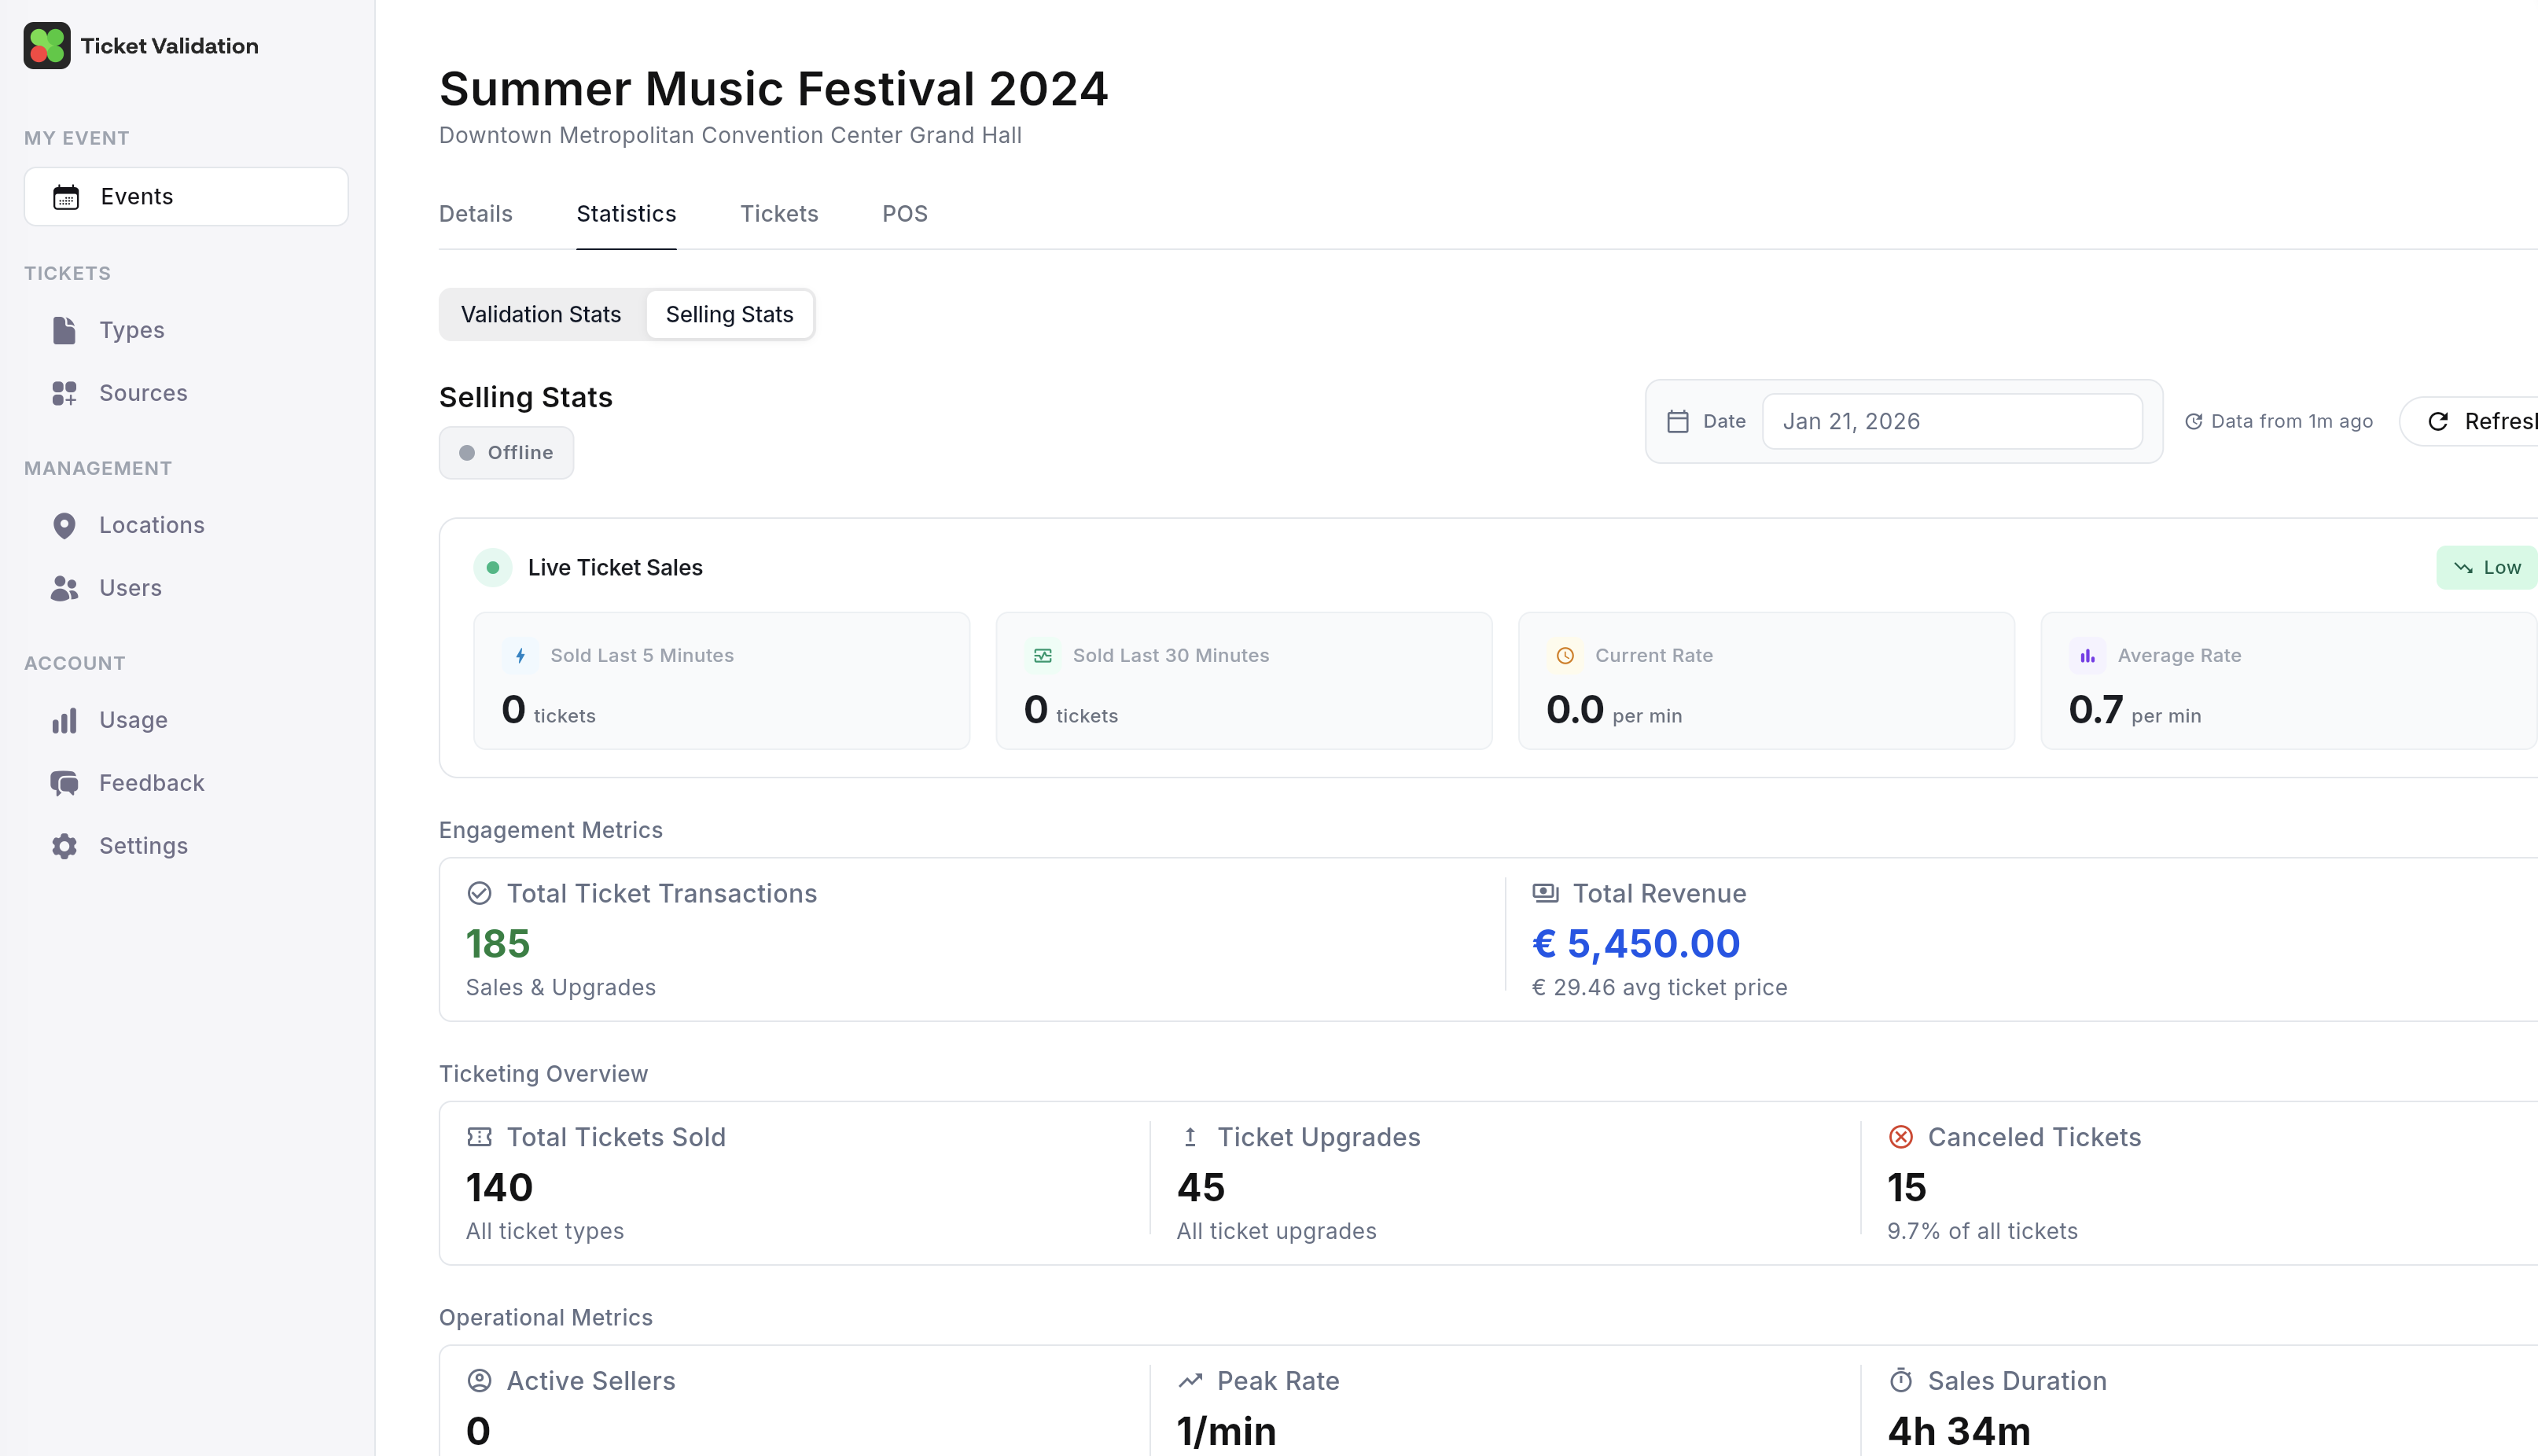
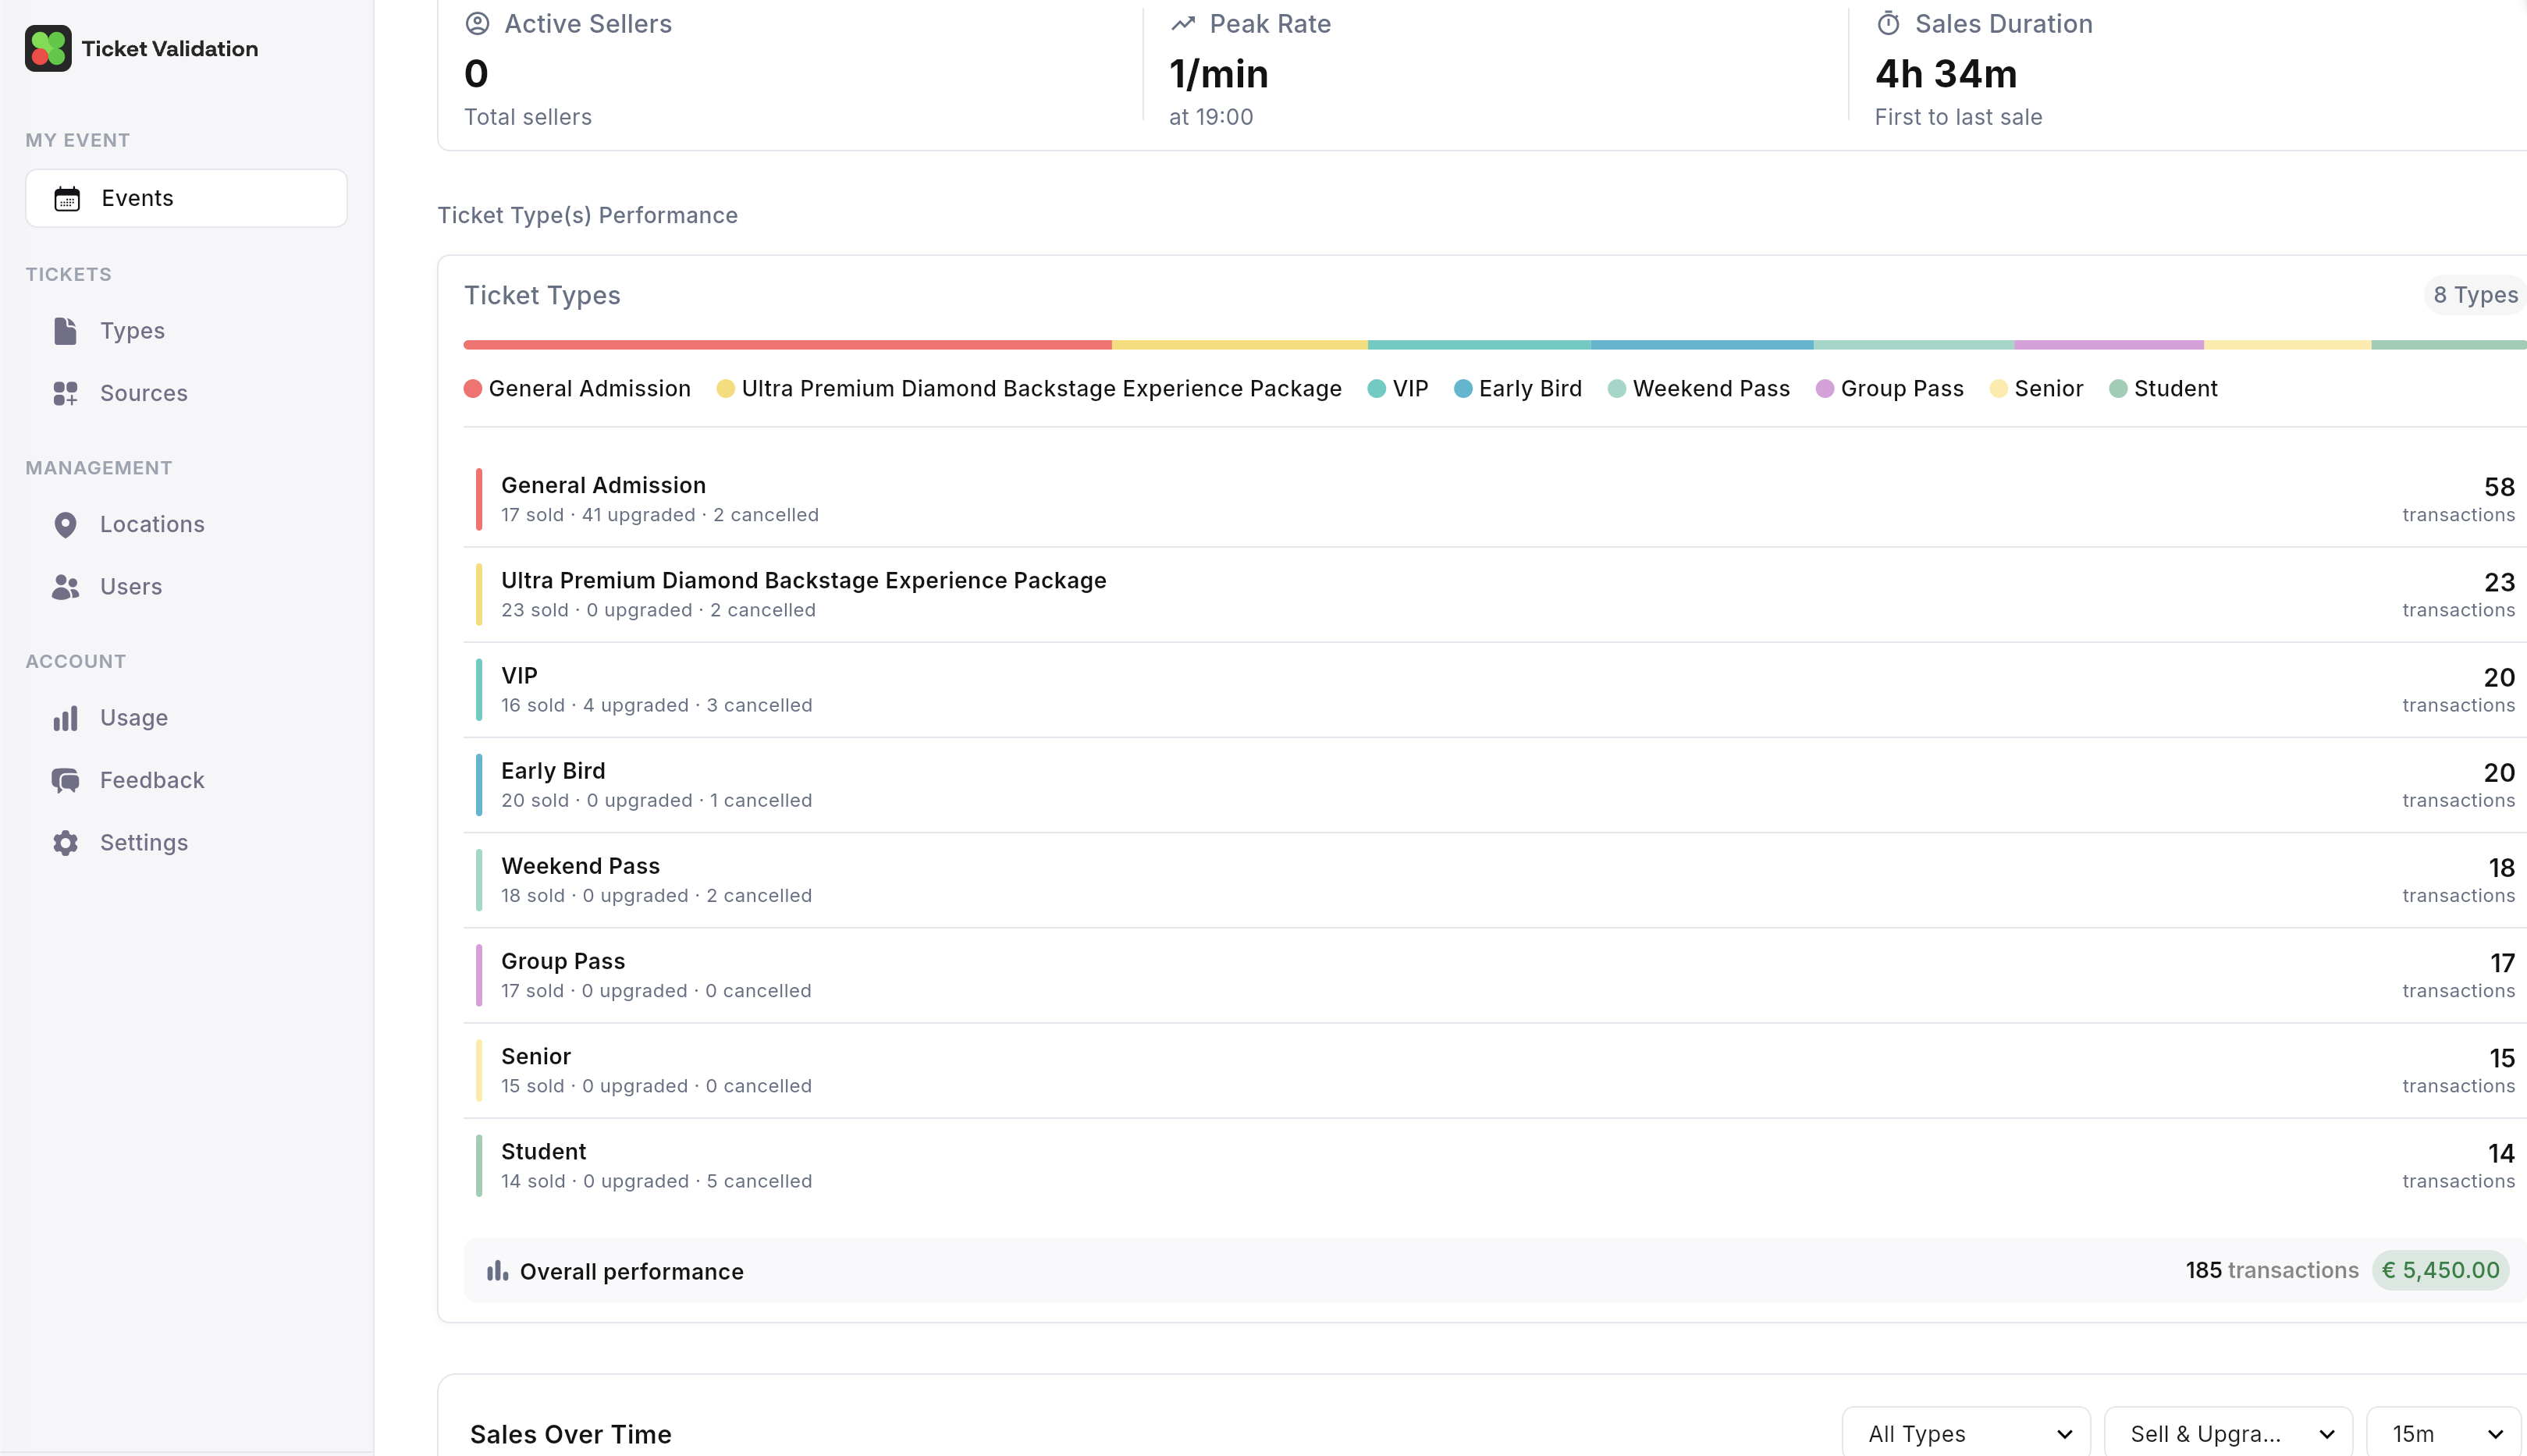
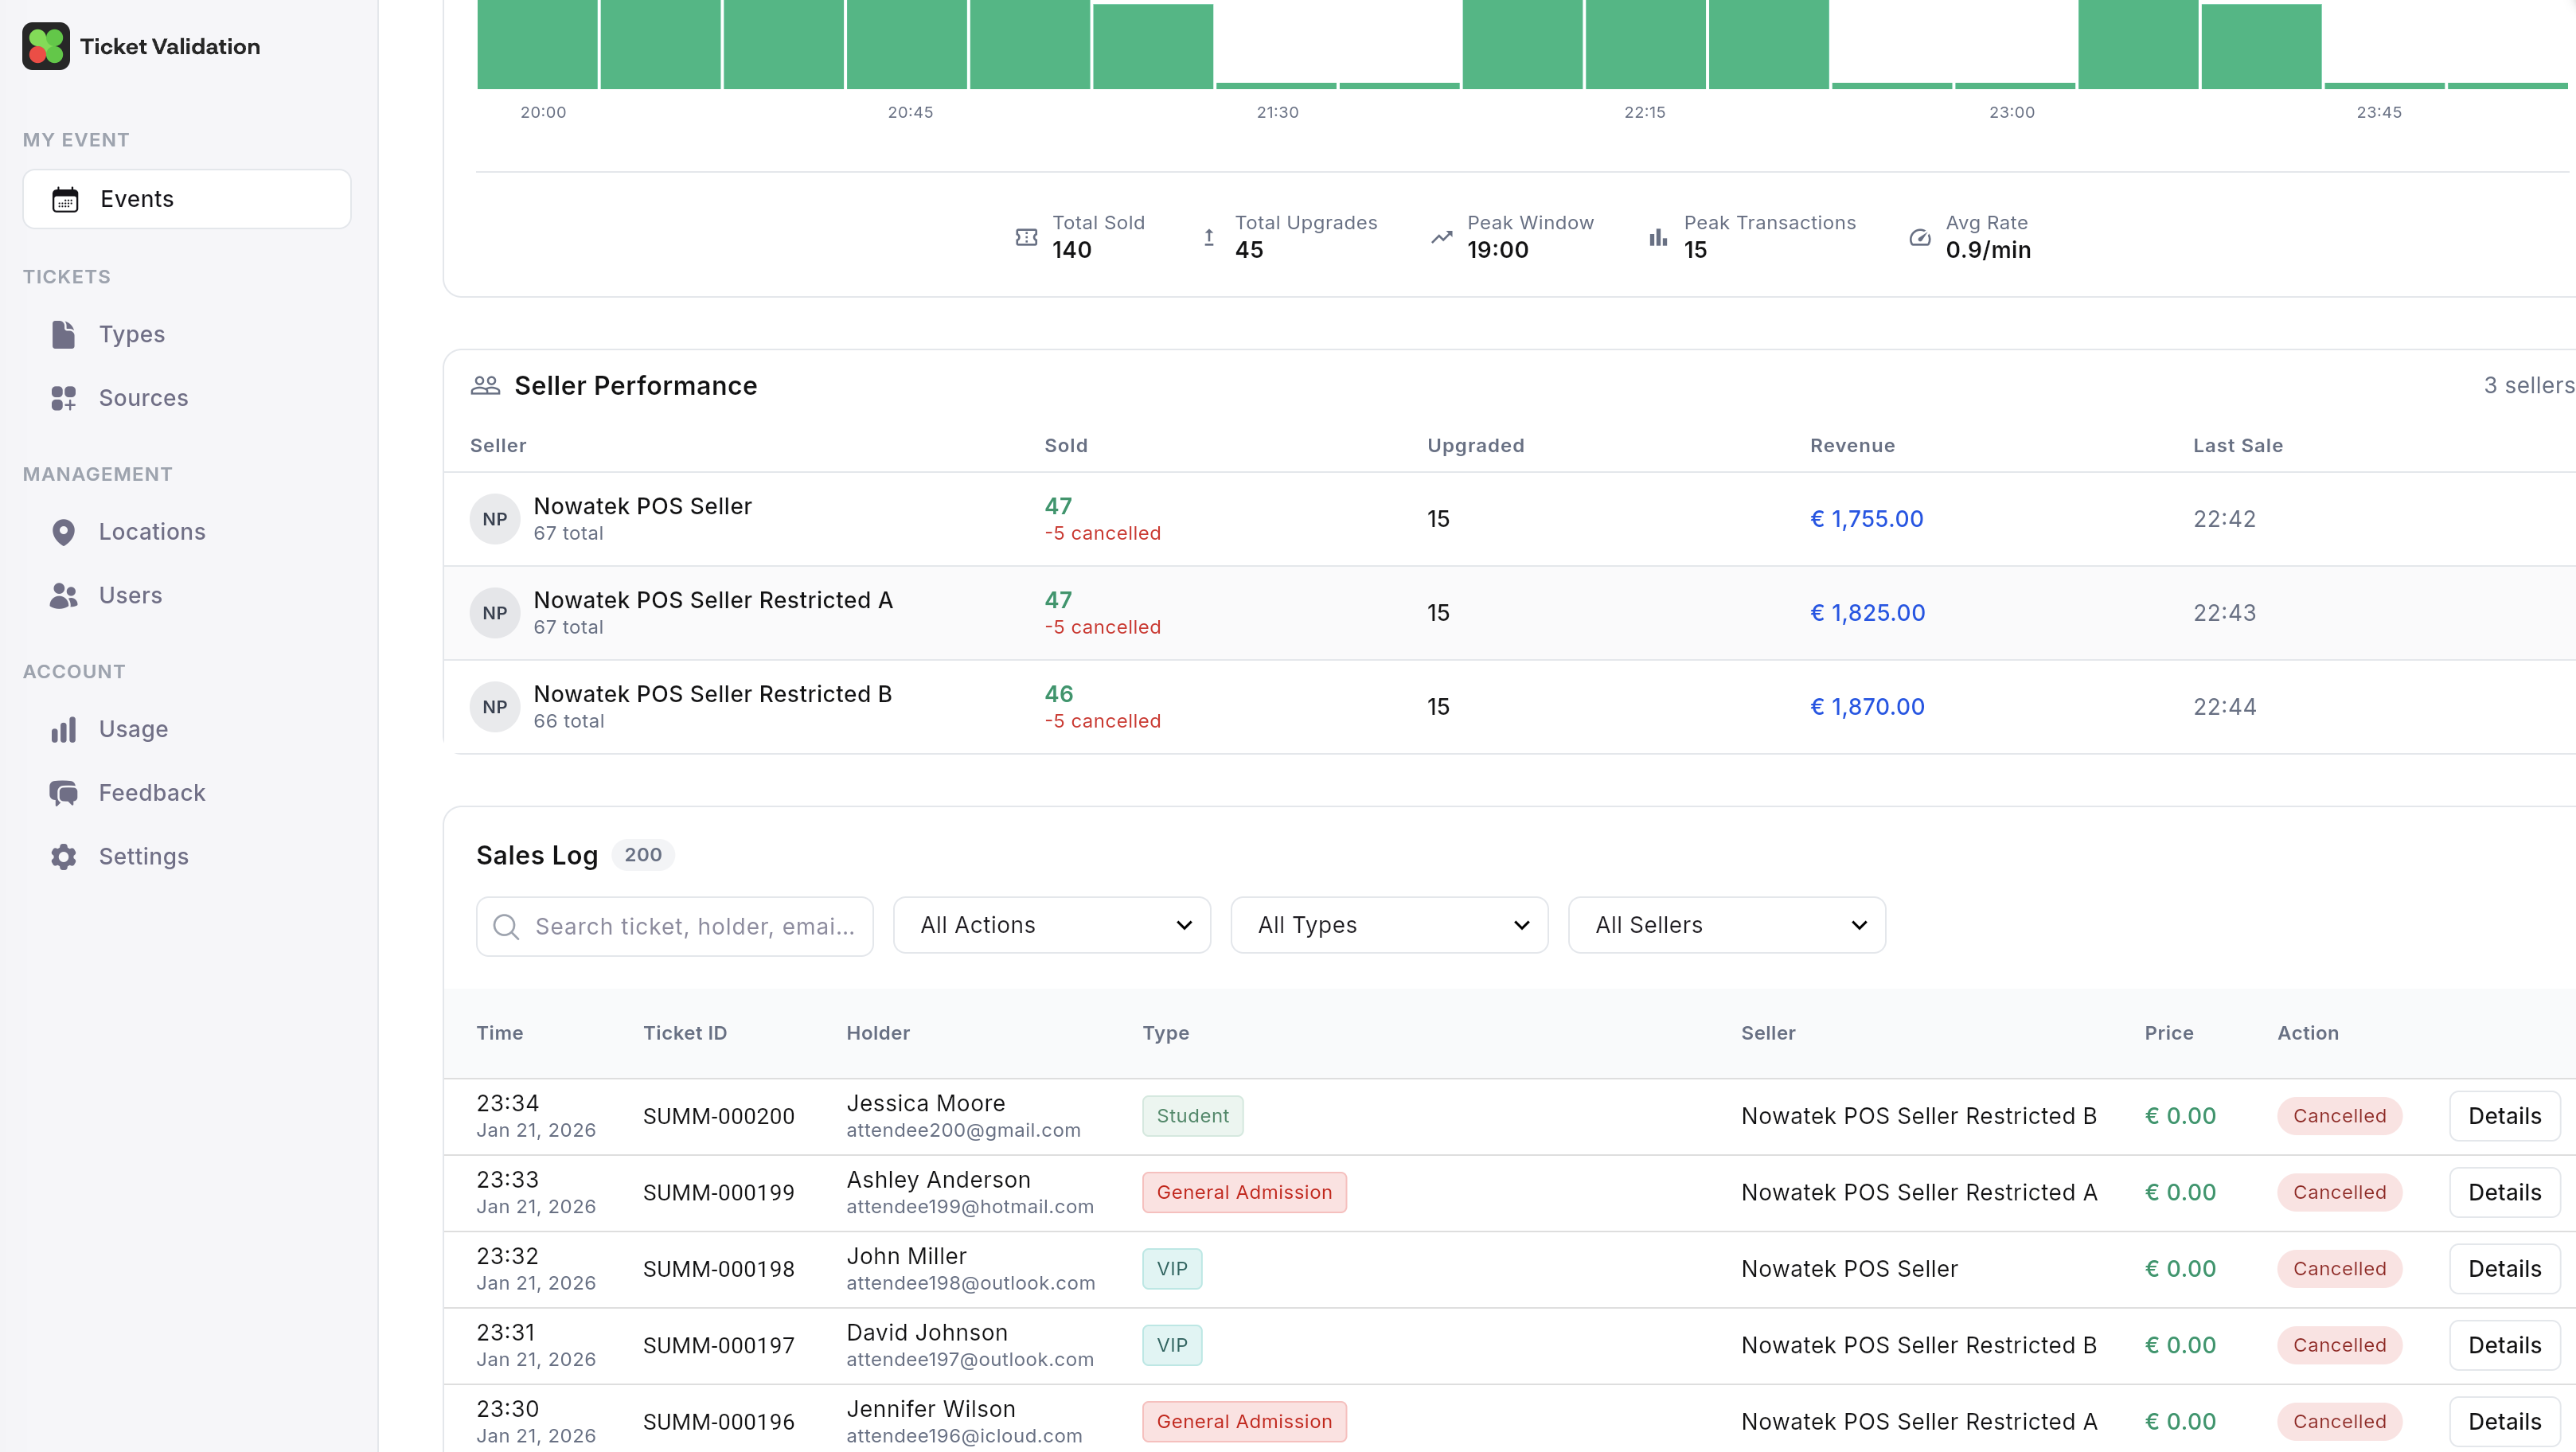
Analyze POS statistics separately from entry statistics
Open the event in the manager web app and switch to the POS tab to review walk-up sales performance. This is separate from the event Statistics tab used for entry/validation analytics.
- Sales totals: gross and count by date and ticket type.
- Seller performance: output by seller account so you can reconcile each shift.
- Activity logs: chronological issue/upgrade records for traceability.
Use POS statistics for box office reconciliation and commercial reporting; use the Statistics tab for validation flow, scan speed, and door operations.
Preview
Checklist for opening night
Organizer: POS enabled on the event, setup wizard completed, seller accounts assigned, POS source configured, prices and capacities reviewed.
Seller devices: App installed, signed in, printer tested or email workflow understood, power and connectivity plan for the box office.
Related: Set up an event, Validation rules.