Activity log
The Activity log is your organisation’s audit trail. It records who did what, when, and on which resource, including account settings, users, events, tickets, locations, POS setup, and more, so you can investigate changes with confidence.
Open it from the left navigation under Account → Activity in the web manager app. Entries are newest first and scoped to your organisation only.
Each row shows the date, the user (or system actor), the action, and the target that was affected. Use Details on a row when you need the field-level before/after values, IP address, or other context.
Preview
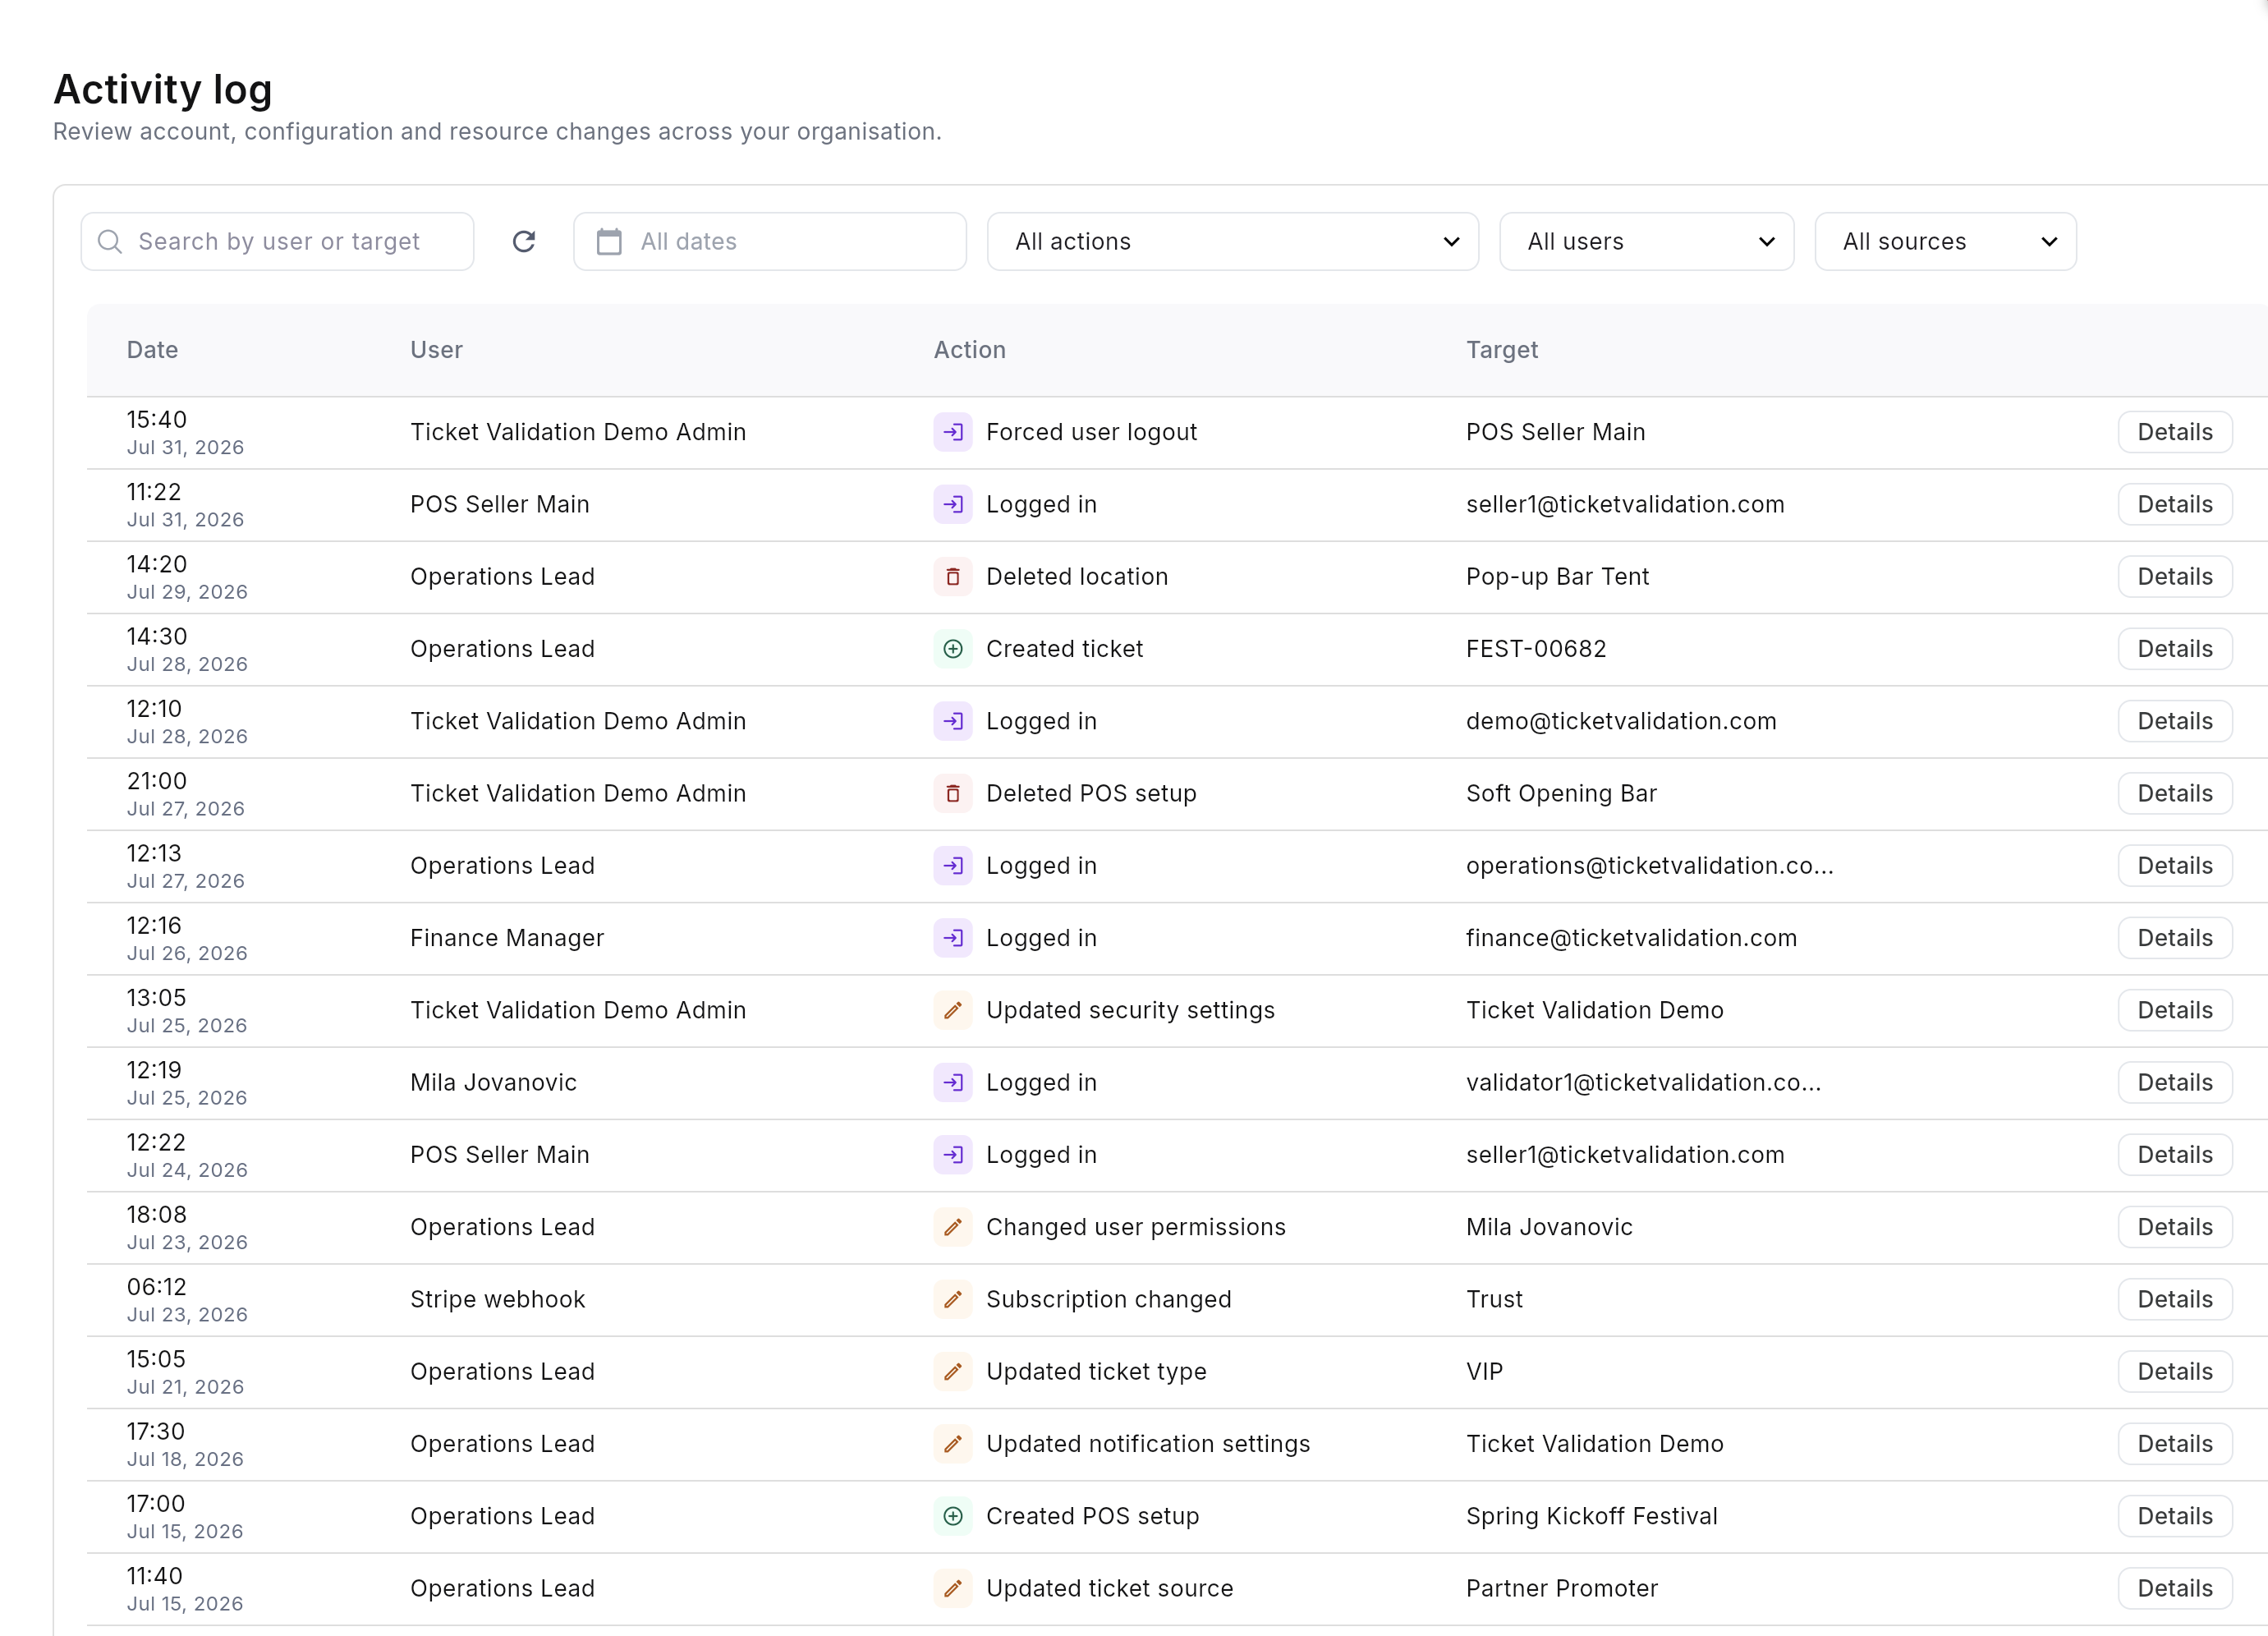
Administrators with an active subscription can open the Activity log.
Viewers and validators cannot access this screen. It is intended for account owners and ops leads who manage configuration and team access.
Open the Activity log
Sign in to the web app. In the left navigation, open the Account section and select Activity.
The page title is Activity log. You will see a filterable table of recent changes across your organisation. Use the refresh control when you want the latest entries without leaving the page.
Search and filter
Narrow the trail with the filter bar above the table:
- Search: match by user name, email, or target label (for example a ticket code, location name, or person).
- Date: limit to a date range when investigating a specific night or rollout window.
- Action: filter to one action type (logins, permission changes, deletions, ticket creates, and so on).
- User: show only entries performed by a specific teammate.
- Source: distinguish human users from system or integration actors when needed.
Tip: Combine search with an action filter when you already know what happened (for example “Deleted location” + the venue name).
Read a row and open Details
The list is designed for a quick scan:
- Date: when the change happened.
- User: who initiated it (admins, ops leads, or system actors such as billing webhooks).
- Action: a clear label with an icon (login, logout, create, update, delete, and similar).
- Target: the resource that was affected (user, location, ticket, POS setup, settings area, and more).
Click Details to see the field-level diff (old vs new values), plus request context such as IP address when available. Saving a form with no real changes does not create an entry. The trail only contains meaningful updates.
Typical entries include:
- Authentication: logins, forced logouts, password resets, and failed login attempts.
- Users & permissions: invites, role changes, and removals.
- Organisation settings: security, notifications, and related account configuration.
- Events, locations & ticket configuration: creates, updates, and deletes.
- Tickets: individual creates/updates plus summarised bulk imports and deletes (one entry per operation, not one per row).
- POS setup: configuration changes for point-of-sale sellers.
- API keys & billing: key create/revoke and subscription changes when they apply to your account.
High-volume operational streams stay on their dedicated screens:
- Ticket validations: use Event statistics and door-side validation history.
- POS sales: use the seller Point of Sale activity log for issues, upgrades, and cancellations.
The Activity log is for account and configuration accountability, not for every scan or sale.
- After a permissions or security change, filter by that user or action to confirm it landed as intended.
- When something “disappeared” (location, POS setup, ticket type), search the target name and look for delete or update actions.
- Treat failed-login entries as a security signal, especially unexpected spikes outside show hours.
- Older entries may fall outside the retention window; if a date range returns nothing far in the past, that is expected.
Know who changed what
Open Account → Activity in the left navigation, filter to the person or resource you care about, and open Details when you need the full before/after picture. Pair it with account setup when onboarding admins, and with event statistics when you are investigating door activity rather than configuration changes.